September 2016

More progress on the JMRI Panel
Sep 26, 2016
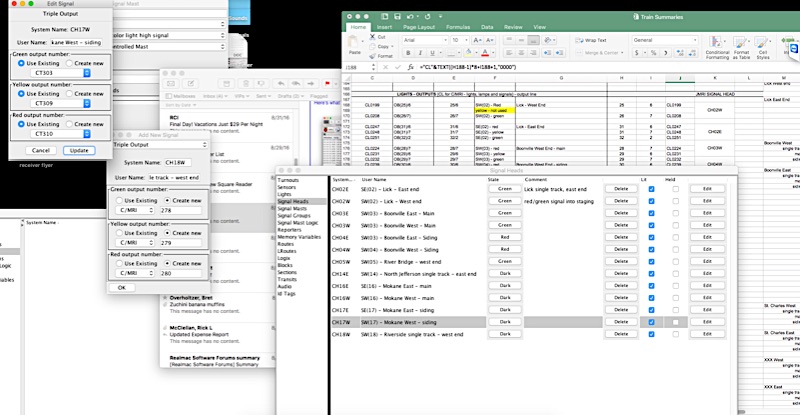
I've made a lot of progress on the JMRI panel since last time, adding most of the remaining on-layout signals to the panel, and latching the panel logic to the C/MRI hardware to light the signals on the layout. The hardware logic is a bit of an iterative process, since the data entry is manual and the software is pretty finicky about get the correct address entered to light the LEDs!
I'm using a simple ABS signaling logic, which is perfect for my needs. I'm losing a bit of functionality at the moment. For example, the C/MRI signals will knock down to red on any change, delay a tick, then show the proper aspect…the JMRI signals do not have this feature. It's the ability to program in those neat features that I really miss in the JMRI system. But I'm really digging the look of the panel, so, to paraphrase Clarke of "Lewis and Clarke" fame, I will "proceed on".
But is it modeling?
Sep 26, 2016
After my op session on Wednesday, I had several new items on my layout to-do list. Now my to-do list is about 10 pages long, probably not unlike any other layout owner's list. But I added several items that the typical modeler/layout owner may not have - programming upgrades.
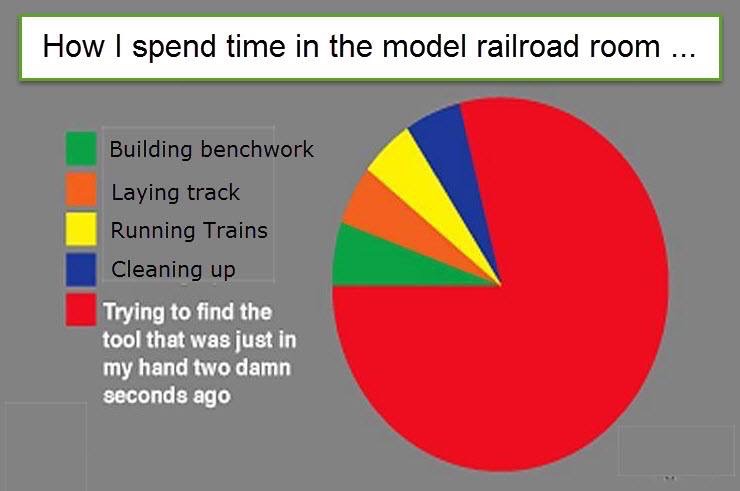
With the exception of late-morning/early afternoon on Saturday (which I spent running on the awesome CB&Q - Hannibal Division), I spent the ENTIRE weekend working on improvements to the dispatchers screen. And my ongoing question as I spend hour after hour in front of the computer screen is: Does this count as modeling?
The picture above shows how I spent my time. I am adding code to drive my existing signals with the JMRI PanelPro software. This software is VERY powerful and full of options, but there is a bit of a learning curve. I'm in the process of defining the output that drive individual red, green, and yellow LED signal, then defining signal heads, comprised of those three individual LEDs. It is very precise work and requires a decent level of organization and record keeping.
I guess that I will call it modeling until somebody corrects me.
The old and the new
Sep 25, 2016 Filed in: Operations
I've been working on the dispatcher's screen lately, improving both the DOS-based QuickBASIC version and the MacOS-based JMRI version.
Here is the QuickBASIC version that I have had for several years:

The first thing that you'll note is that there is more information on the DOS screen at this time. It includes signals, direction of travel, and logs the train symbols as the trains move across the screen. The graphics are a bit clunky compared to the slick JMRI screen, but for a program that uses only ASCII symbols, I thought the graphics were pretty nice for its time.
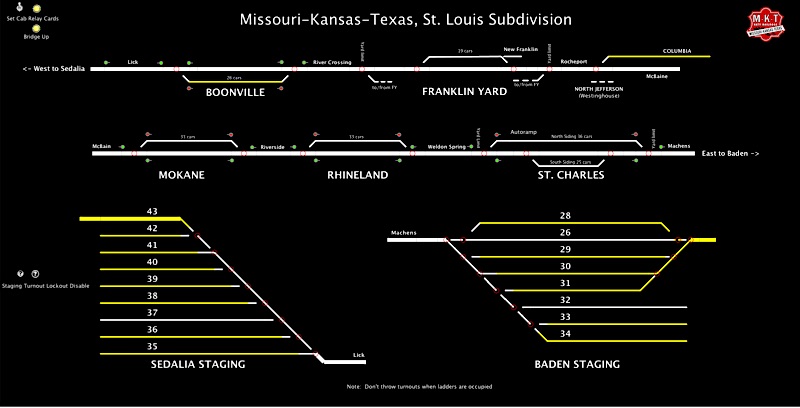
Here is the JMRI version:

I have only started to add the signals onto the JMRI panel, and I haven't implemented train logging yet.
I'm torn about continuing to use the QuickBASIC program and am wondering if I should just make a whole-hearted jump to the JMRI panel. Both work fine, but I have been having intermittent glitches with the Mac mini that I have been using to drive the QuickBASIC version (see previous post).
I will post further updates on the blog about the panel drama as I continue to refine both programs.
Here is the QuickBASIC version that I have had for several years:
The first thing that you'll note is that there is more information on the DOS screen at this time. It includes signals, direction of travel, and logs the train symbols as the trains move across the screen. The graphics are a bit clunky compared to the slick JMRI screen, but for a program that uses only ASCII symbols, I thought the graphics were pretty nice for its time.
Here is the JMRI version:
I have only started to add the signals onto the JMRI panel, and I haven't implemented train logging yet.
I'm torn about continuing to use the QuickBASIC program and am wondering if I should just make a whole-hearted jump to the JMRI panel. Both work fine, but I have been having intermittent glitches with the Mac mini that I have been using to drive the QuickBASIC version (see previous post).
I will post further updates on the blog about the panel drama as I continue to refine both programs.
Op session recap
Sep 23, 2016
There was an op session on the Mighty MKT last night, and I had seven of my favorite people over to bring the layout to life. It was a fun and adventurous evening!
For me, the build-up to a session starts about a week earlier. I have a formal checklist that I have created and refined over the years, reminding me of the myriad big and small things that are necessary for a successful session. I have the layout-checklist items down pat, but it’s the non-layout items that sometimes can fall through the cracks. For example, “load the crew lounge chiller with sodas” and “put batteries in the radios”. Or “buy Fiddle Faddle snacks for Steve and Dan”!
Once the trains are all staged, and the industries have waybills turned and balanced, my attention goes to the final two items. It seems that I always save them for last, mainly because I dread the tasks: cleaning the track and cleaning the locomotive wheels. Oh! How I wish I had the HO sized wheel tread and rail, with their larger surface area and heavier locomotives. For an N-scale DCC layout to run with any modicum of silky smoothness, you need scrupulously clean track and wheels. And powered frogs. And hand-built turnouts.
I try to finish wheel cleaning the day before the session, just so it definitely gets accomplished. Track cleaning is an on-going and continuing (and continual) process and occurs right up to (and during!) the session.
About 20 minutes before the session, I was doing a final walkthrough, testing turnout operation and the lift bridge. I noticed that the east Rhineland turnout was not throwing. Darn! That was on my to-do list. The tortimus fulcrum had fallen down and had been meaning to fix that for the past two weeks! I shut the power off the layout (to relax the torti motor). Grabbing the Kasper commemorative wand-o’-light, I dove under the layout to fix that fulcrum. I head a “snap” and “sproing”, but I thought that it was just the plastic fulcrum snapping into place. I gave it no further notice and went to the computer to restart the system.
I need to digress a bit and explain that, about two months ago, the computer used to run the computer/model railroad interface (C/MRI) that drives the dispatching screen, and signals (among many other things) had been misbehaving. The C/MRI program would repeatedly crash, then would work properly, then crash, then work, etc. Then, as suddenly as it began, the crashing problem disappeared. At the time, I had a bit of a freakout, and prepared a backup computer in case the computer glitch appeared during a session. So I sort of forgot about it. Silly me.
Back to my story: After fixing the torti fulcrum, I went to the dispatcher desk to restart the layout. And it crashed. Restart. Crash! Restart! Crash! Curses!
It’s now 6:50 and I am expecting guests at any moment. Ok. Take a deep breath. No problem. I’ll just pull out the backup laptop and all will be well. I recalled that I had even recently upgraded the backup computer with a solid state drive to improve performance. Wait! After I installed the new drive, did I reinstall the program and USB drivers needed to make the C/MRI program work? I can’t recall. With sweat dripping down my face, I booted the backup computer. Curses again! I did not install the C/MRI items! It’s now 6:55 and I hear footsteps of some of my guests coming down the basement stairs.
What to do? What to do? My backup to the backup is a half-baked Java Model Railroad Interface (JMRI) program. It will power the layout and throw the staging turnouts, but the signaling system will not work. And the dispatcher’s screen is not fully functional. I start up the JMRI panels and go out to greet the operators.
We have a brief orientation session (not my usual entertaining 45 minute presentation, much to the relief of my regular crew!), and Bill graciously offers to dispatch. I tell him that it will be a special adventure in the dispatcher’s chair today. Joe is the yardmaster, so he’s up to speed, so I spend my time with Bill, showing him the features (and idiosyncrasies) of the JMRI train monitor screen. All in all, the JMRI program worked pretty well, with the exception of a couple of turnouts that the train crews couldn’t throw in the field. The dispatcher was able to throw those turnouts, so we made it work.
About 20 minutes into the session, Engineer Rick commented, “East Rhineland turnout is missing a point!” I run into the layout room and, sure enough, the point is laying about 5 inches down the track! Hmmm, maybe that was the “sproing” that I heard just before all hell broke loose with the computer program. I gathered the soldering equipment in anticipation of making a field repair (or begging Joe to make the repair), but we were able to replace the point temporarily and work around the broken turnout during the session. Another item for the to-do list!
Overall, the session went about as smoothly as can be expected, with only a balky turnout or derailment here and there. More importantly, everybody seemed to have a good time.
Like Ragnarok in Norse mythology, where the world is destroyed, only to be subsequently recreated, so now it’s back to the to-do list and the cycle starts anew!
Op Session tonight on the Mighty MKT!
Sep 21, 2016
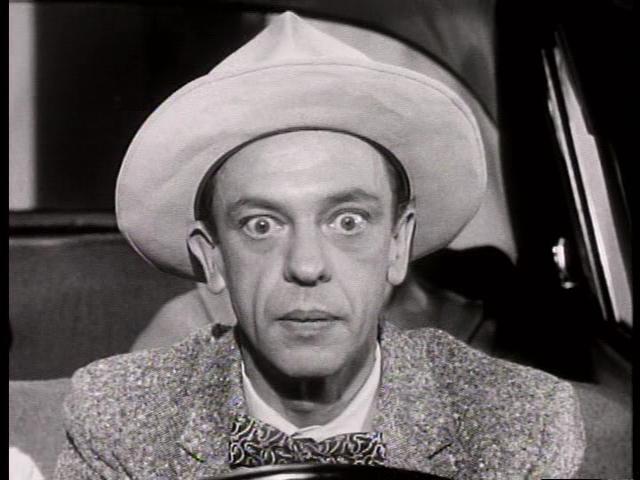
This is what I usually look like just before an Op Session!
Resistance wheels
Sep 18, 2016 Filed in: Rolling stock | electronics
If you want signaling on your layout (and who doesn't!), you will need some way of determining block occupancy. I use Bruce Chubb's Optimized Detectors, when are a current sensing-type detector, and they have worked flawlessly on the Mighty MKT for years.
The current sensing detectors can sense the locomotives in a block, but for cabooses and rolling stock, you need to add a resistance wheels set or two on the car to create current path that trips the detectors. We do that by adding a small (and I mean small) surface mount resistor across the axle and the gap on the insulated wheel. The current path is completed using conductive paint.
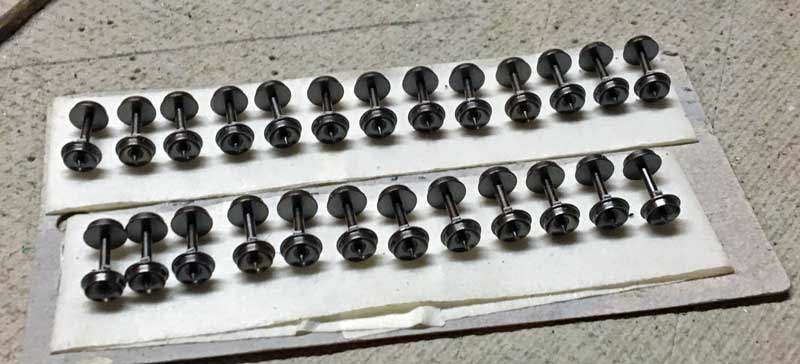
Step one is to layout out several wheels on some masking tape so you can apply the conductive material. You then place a very small amount of CA (superglue) to the insulated side of the axle, and gently place the resistor on the glue, angled across the gap between the axle and the metal portion of the insulated wheel.
After the glue dries, you can then use a fine pick or needle point to add a very small dollop of the conductive paint, first to the wheel side, then to the axle side. In N scale, this is very precise and tedious work, since you need to make sure not to cover the entire resistor with paint, nor submerge the resistor in the drop of CA. My buddy, Joe, is MUCH better at this process than I am.
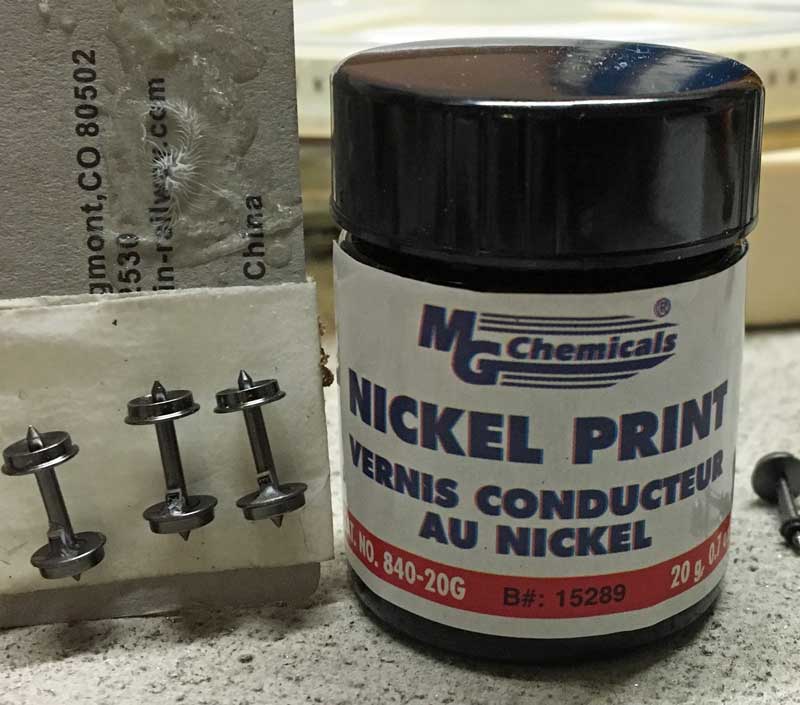
If you look closely, you can see the axle side of the bottom wheels covered with the conductive paint.
For years, I put conductive wheels only on my cabooses, and used software to "detect" short blocks on the layout. I do not detect the turnouts individually as you would need to do on a full-blown CTC layout. My goal is to gradually add resistance axle to every car 50 ft or shorter, and two (opposite side) axles on all cars longer than 50 ft.
I bought a package of 100 wheels from Fox River Valley, which is a good start toward my goal of at least one detected axle per car on the layout. Three or four more packages and I can call it good!
The current sensing detectors can sense the locomotives in a block, but for cabooses and rolling stock, you need to add a resistance wheels set or two on the car to create current path that trips the detectors. We do that by adding a small (and I mean small) surface mount resistor across the axle and the gap on the insulated wheel. The current path is completed using conductive paint.
Step one is to layout out several wheels on some masking tape so you can apply the conductive material. You then place a very small amount of CA (superglue) to the insulated side of the axle, and gently place the resistor on the glue, angled across the gap between the axle and the metal portion of the insulated wheel.
After the glue dries, you can then use a fine pick or needle point to add a very small dollop of the conductive paint, first to the wheel side, then to the axle side. In N scale, this is very precise and tedious work, since you need to make sure not to cover the entire resistor with paint, nor submerge the resistor in the drop of CA. My buddy, Joe, is MUCH better at this process than I am.
If you look closely, you can see the axle side of the bottom wheels covered with the conductive paint.
For years, I put conductive wheels only on my cabooses, and used software to "detect" short blocks on the layout. I do not detect the turnouts individually as you would need to do on a full-blown CTC layout. My goal is to gradually add resistance axle to every car 50 ft or shorter, and two (opposite side) axles on all cars longer than 50 ft.
I bought a package of 100 wheels from Fox River Valley, which is a good start toward my goal of at least one detected axle per car on the layout. Three or four more packages and I can call it good!
New Holy Grail adventure film coming soon!
Sep 16, 2016
The Union Pacific Katy Heritage Unit!
Sep 14, 2016
Found this on the Kansas Railfans Facebook page the other day:
Katy Heritage unit filmed on the Kansas Sub.
Katy Heritage unit filmed on the Kansas Sub.
Backdrop lights
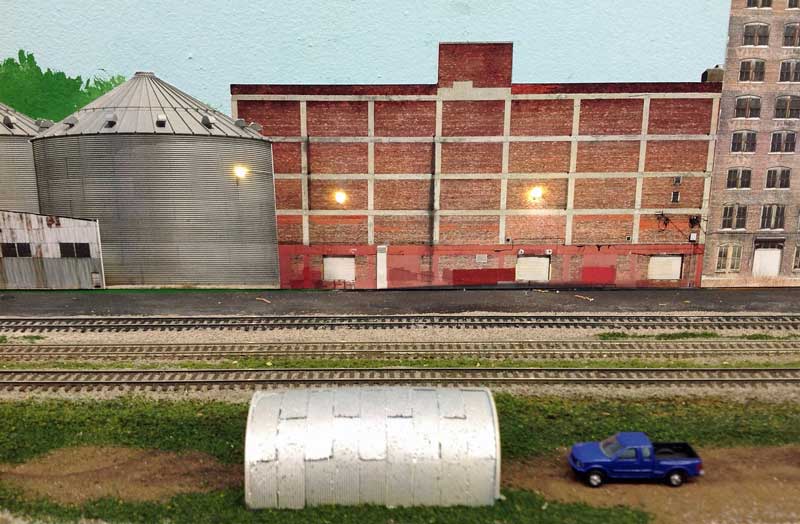
In several areas around the layout, I have photo-realistic backdrop flats, made from pictures of real industries around Kansas City, taken by my buddy, Steve. They add a great sense of realism to my industrial areas.
I recently added LED lights to the flats in St. Charles, simulating the security lighting that you would see in any industrial or urban area. Using very small. pre-wired LED, and adding magnet wire to the leads, a small hole was drilled into the backdrop. The LEDs were secured with a drop of CA glue, and the leads snaked down to below the layout. As per my usual lighting method (described on other blog entries), I made a bus for the wires and powered them with my 12 volt supply.
The effect is quite nice, and make the flats seem less 2-dimensional.
Switchlist for the Mighty MKT
Sep 14, 2016 Filed in: Prototype Research | Operations
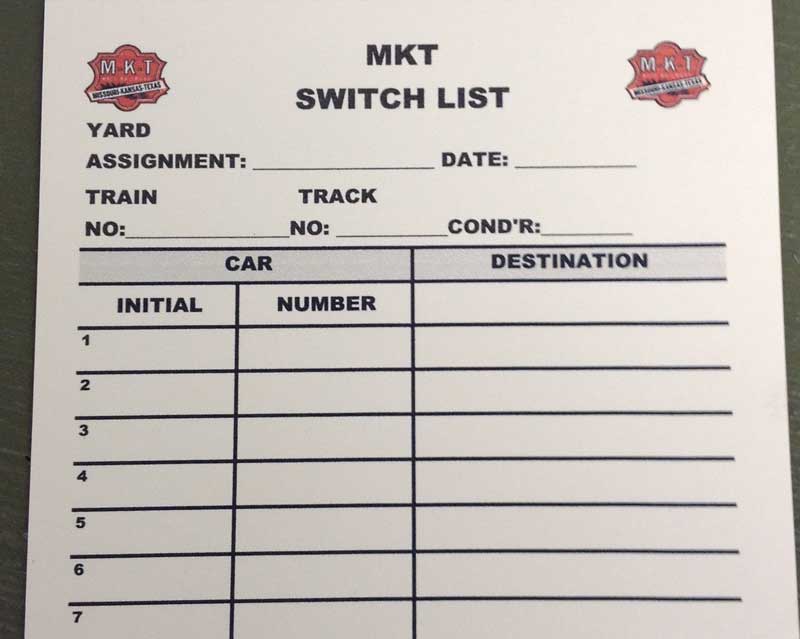
Many of my railroady friends like to use switchlists during operating sessions. I use them off-and-on, but generally prefer just to string the car cars out along the layout when I'm working a train (definitely NOT an Elite Operator™ habit!!).
For a long time, I copied a prototype switchlist that I found at a train meet, but I recent decided to make some Mighty MKT-specific switch list. I made a template in Microsoft Excel (using the prototype list as a guide) and printed the lists out on buff-colored card stock.
They look good, and add a nice custom touch to the layout.
Improvements to SafetyKleen
Sep 14, 2016 Filed in: Track
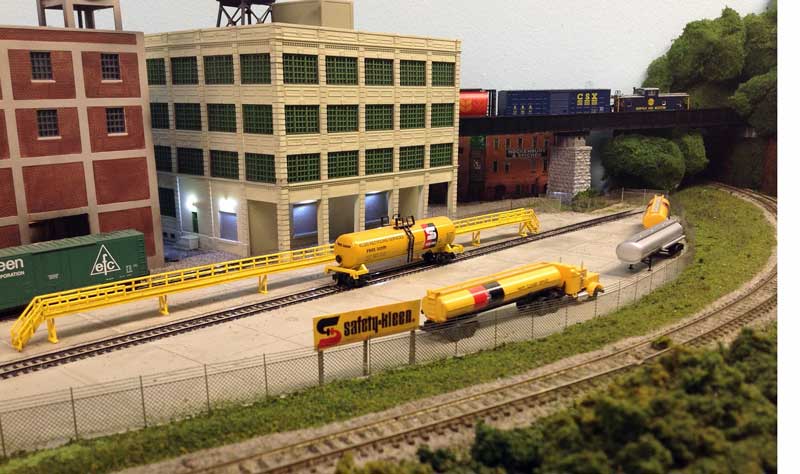
With the help of my buddy, Steve, I've been working on the St. Charles industries. Here is a nice shot of the SafeyKleen waste transfer facility. This industry accepts waste oil and solvents by truck and transfers the waste to rail tank cars.
You can see the ACF RailCar repair facility in the background.
Build an easyDCC computer interface cable!
Sep 09, 2016
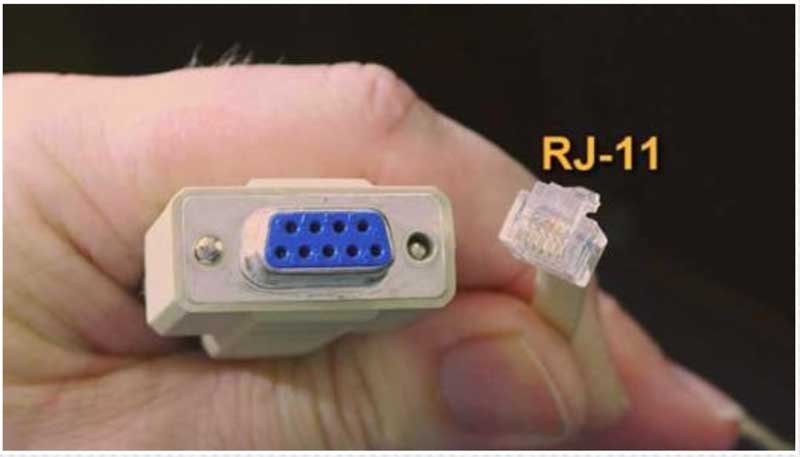
If you are an EasyDCC fan (and who isn't?!), and you want to interface your command station to a Mac (or PC), you may find this video useful.
The video gives you step-by-step directions for making the custom cable required for the connection. Making the cable isn't difficult, but connecting the correct pins can be a bit tricky.
This video is located on the excellent trainmasters.tv web site. They have tons of useful content there. I highly recommend that you get a subscription to their site.
New turnout at Mokane!
Sep 07, 2016 Filed in: Track
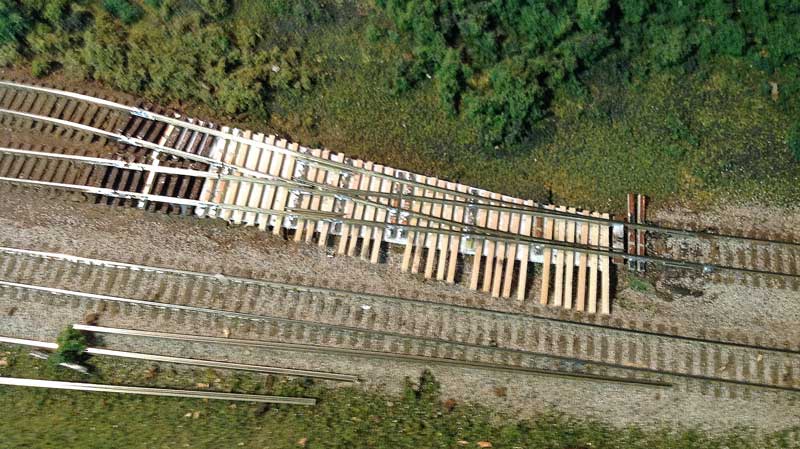
Turnout installed, waiting for glue to dry on the ties.
In my never-ending quest to remove suck from the layout, I implored my good buddy, Joe, to build (and install) another of his awesome Kasper MKVII, Rev 2 turnouts for the west end industries at Mokane. Actually, we had earlier struck an agreement - if he installed this turnout, I would have an operating session within two weeks!
So tonight, Joe kept his part of the bargain. Now I need to call a crew, clean the basement, and get the soda fridge loaded!
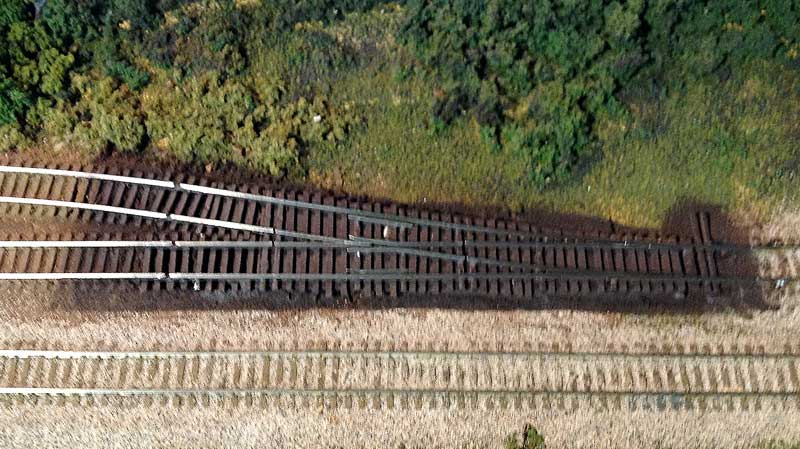
Turnout ties cut and painted. Ballasting will be next.
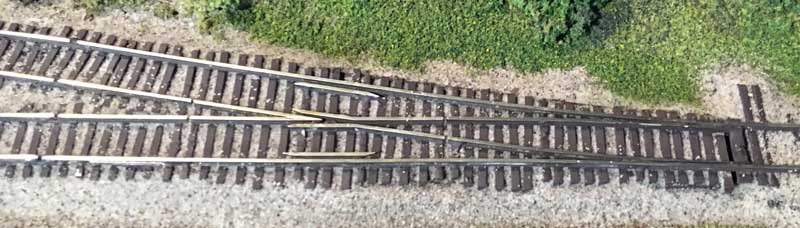
Here is the turnout after ballasting. Now a thorough cleaning and check to make sure that the points aren't cemented shut (they were) and this turnout is ready to be placed back into service.
I needed TWO resistors to finish a project!
Sep 07, 2016
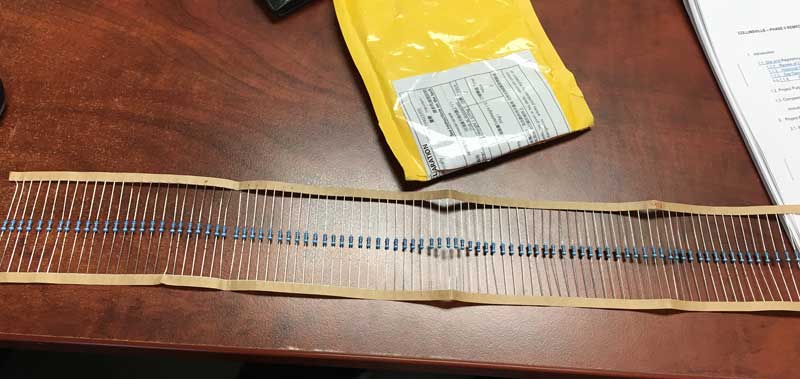
I've been working on finishing the Bruce Chubb grade crossing boards, and I needed two lousy 91K ohm resistors to complete them.
91K ohms is an oddly specific resistor value. I headed to eBay and, sure enough, you can get them from a variety of sources. I had to order a minimum of 100, but it was only $2.50 or so, and free shipping (from China, of course).
It took about 30 days for them to arrive, but now I have plenty of 91K ohm resistors to spare. I certainly don't need 98 more grade crossing boards for my layout!
Determining Car Demand
Sep 07, 2016 Filed in: Operations
Method to Estimate Car Demand
I love to buy new cars for the layout. As a matter of fact, I have boxes and boxes of cars that are not on the layout, because I:
After a fun week of hosting multiple operating sessions for attendees to the National N-Scale Convention (which was held in Kansas City in late-June 2016), I had the opportunity to assess the traffic flow on the Mighty MKT. The following discussion presents my criteria and parameters for determining the quantity of cars that are waybilled on the layout.
My rule of thumb is to have each industrial spots in each town half full of car. Of those cars spotted in town, I try to have half of them be pulls and the other half will remain in the town. So approximately 25 percent of the track capacity will be turned over during an operating session. A small town like Mokane on the Mighty MKT has four separate industries with a total of 12 spots, with cars at six of those industry spots. I would set up the waybills to pull 3 of those cars during the session, and have the locals bring in three new cars.
So, there are three factors that enter into the car demand on a layout:
The next step is to estimate the number of cars that would be at an industry at any given time. Using my 50 percent rule of thumb, approximately 96 cars would be located at industries on the layout (note that this excludes the autoracks in St. Charles, the pigs at the TOFC ramps in New Franklin and St. Charles, and the UP industries in Boonville.
Of these 96 cars, 50 percent will be picked up by the locals during the operating session and replaced by new cars brought in by the locals. These 48 (0.5 * 96) cars will be hauled back to Franklin Yard and will go out on the 100-series freight trains (east or west, depending on the direction shown on the waybill for a given car. The layout has seven primary destinations (Boonville, New Franklin, North Jefferson (Westinghouse), Columbia, Mokane, Rhineland, and St. Charles), so each destination will, on average, receive seven cars during a typical operating session. Functionally, the larger destinations will receive proportionally more cars.
The Mighty MKT runs up to five locals during a session:
Total Cars on the Layout
If you have stuck with this analysis up to this point, I can anticipate your next question: “Geez, only 48 cars moving on the layout? Why bother?!” It turns out to be a bit more complicated than that. On the Mighty MKT, at any given time, cars can exist in only six states (not including autoracks the TOFC):
So the 48 cars on the five locals make for an average 10-car train length. And the 48 cars in the five staged trains (101, 102, 103, 104, and Extra 211, a yard to yard transfer) result in an average 10-car cut to be delivered to Franklin Yard per train.
I love to buy new cars for the layout. As a matter of fact, I have boxes and boxes of cars that are not on the layout, because I:
- Originally over-purchased cars, and
- I have, over the years, removed a TON of cars from the layout because it gets too plugged and unbalanced after several operating sessions.
After a fun week of hosting multiple operating sessions for attendees to the National N-Scale Convention (which was held in Kansas City in late-June 2016), I had the opportunity to assess the traffic flow on the Mighty MKT. The following discussion presents my criteria and parameters for determining the quantity of cars that are waybilled on the layout.
My rule of thumb is to have each industrial spots in each town half full of car. Of those cars spotted in town, I try to have half of them be pulls and the other half will remain in the town. So approximately 25 percent of the track capacity will be turned over during an operating session. A small town like Mokane on the Mighty MKT has four separate industries with a total of 12 spots, with cars at six of those industry spots. I would set up the waybills to pull 3 of those cars during the session, and have the locals bring in three new cars.
So, there are three factors that enter into the car demand on a layout:
- The number of effective industry spots on the layout
- The percentage of industry spots that would have cars actually located at them (I use 50 percent)
- The percentage of cars that will be picked up from an industry during a given session (I use 50 percent)
The next step is to estimate the number of cars that would be at an industry at any given time. Using my 50 percent rule of thumb, approximately 96 cars would be located at industries on the layout (note that this excludes the autoracks in St. Charles, the pigs at the TOFC ramps in New Franklin and St. Charles, and the UP industries in Boonville.
Of these 96 cars, 50 percent will be picked up by the locals during the operating session and replaced by new cars brought in by the locals. These 48 (0.5 * 96) cars will be hauled back to Franklin Yard and will go out on the 100-series freight trains (east or west, depending on the direction shown on the waybill for a given car. The layout has seven primary destinations (Boonville, New Franklin, North Jefferson (Westinghouse), Columbia, Mokane, Rhineland, and St. Charles), so each destination will, on average, receive seven cars during a typical operating session. Functionally, the larger destinations will receive proportionally more cars.
The Mighty MKT runs up to five locals during a session:
- Boonville
- New Franklin
- Columbia
- St. Charles
- Mokane/Rhineland
Total Cars on the Layout
If you have stuck with this analysis up to this point, I can anticipate your next question: “Geez, only 48 cars moving on the layout? Why bother?!” It turns out to be a bit more complicated than that. On the Mighty MKT, at any given time, cars can exist in only six states (not including autoracks the TOFC):
- At an industry
- On a local to be delivered to an industry
- In the yard, destined to be placed in a future local for delivery
- In the yard, intended for an east or west off-layout destination
- On a train, intended for delivery at Franklin Yard, thence to an on-layout industry
- On a train, intended for an off-layout destination
- At an industry
- On a train destined for Franklin Yard
- Currently on a local OR already in the yard – these items are combined because any car destined for an online industry would be quickly placed onto a local unless the length limit had been met for that given local, or the train had very recently been sent out when the car arrived in the yard.
- 48 cars currently at industries that will NOT get moved during the session (this is the other half of the cars spotted at industries)
- 48 cars currently at industries that WILL get picked up during the session
- 48 cars destined for industries that are either currently on a local or in the yard. These cars will get spotted at the industries to replace the cars picked up.
- 48 cars on staged trains that will be delivered to the yard during the session. These cars feed the yard and provide the traffic that will make up the next round of locals.
So the 48 cars on the five locals make for an average 10-car train length. And the 48 cars in the five staged trains (101, 102, 103, 104, and Extra 211, a yard to yard transfer) result in an average 10-car cut to be delivered to Franklin Yard per train.
Ever wonder what it's like to have a layout with a ten-page to-do list?
Sep 02, 2016
Yeah, it's kinda like that.
A railfan's dream!
Sep 02, 2016 Filed in: Railfanning
Over 7 hours of scenic rail travel from Bergen to Oslo, Norway!