April 2017
For your viewing pleasure
Apr 25, 2017
Sofie Vergara attempting to ride an inflatable bull in a swimming pool.
Is this a great country or what?
Is this a great country or what?
It's the little things
Apr 12, 2017 Filed in: Operations
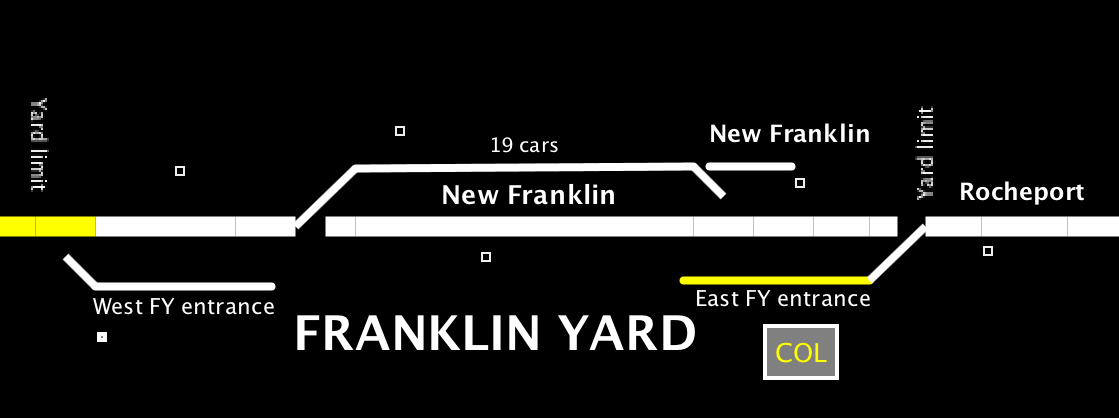
East Franklin Yard Entrance is now detected - the track displays yellow when occupied
I've been working on the JMRI panels lately, adding more functionality and user-friendly features.
One feature that I've wanted for a while, ever since I added train logging on the main screen, is to put block detection on the entrance tracks at Franklin Yard. With the entrance tracks detected, the dispatcher can then enter a train identifier so that the train will be tracked across the main screen
Tonight, I wired the east entrance, and set up the CMRI sensors and JMRI logic code to make it work. I will cocninue with the west entrance track tomorrow (hopefully). This should enhance the dispatcher user experience!

The Autorack Project
Apr 04, 2017
I’ve been working on several projects for the Mighty MKT this spring. Following a generally successful operating session in early March, I had several items added to the old to-do list.
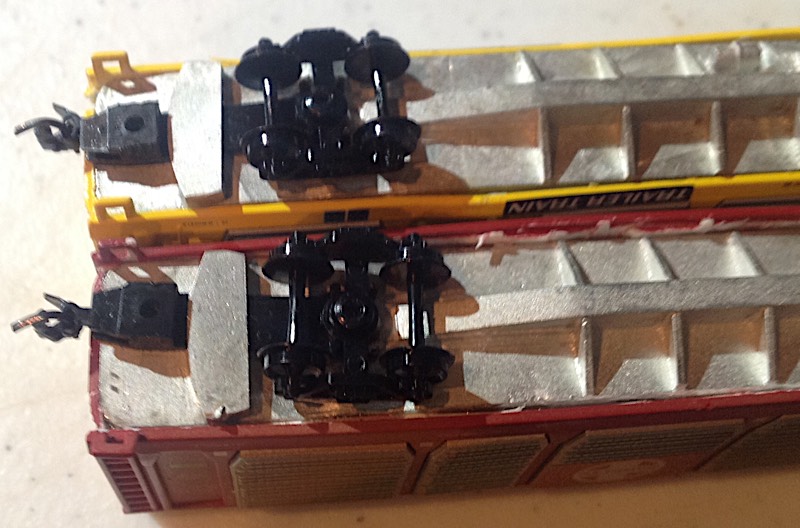
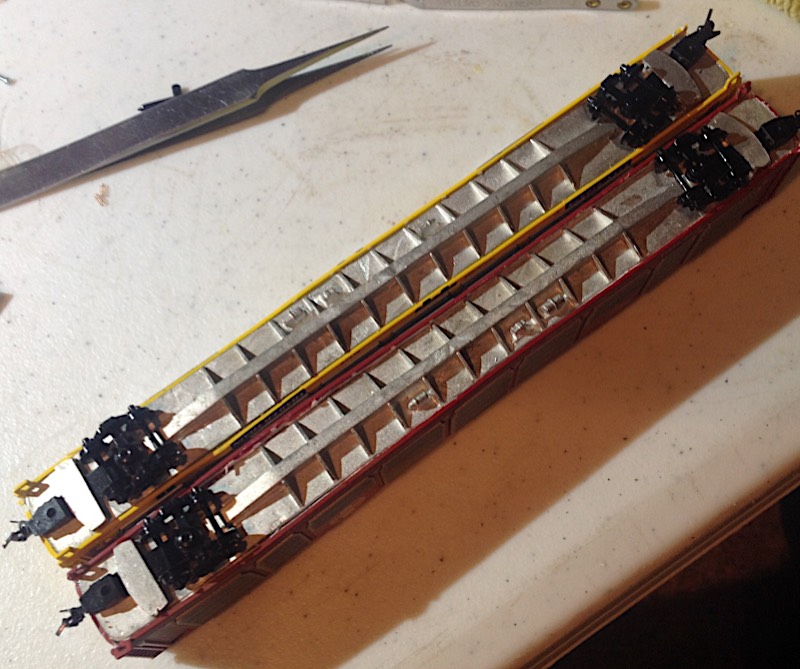
Autorack upgrades – I have two autorack trains that work the autoramp facility at St. Charles, then travel across the layout. My autoracks are the ConCor racks that came out in the early 2000’s and, at the time, were enthusiastically snapped up by N-scalers hungry for racks. They looked fine, but seemed a bit light and top-heavy; they would wobble a bit on the rails. A fellow in England (Alan Curtis) developed a new metal car bottom that would add weight and move the lower center of gravity to improve tracking and reduce the wobble. The upgrade kits are now available from NScaleKits insert URL
Elite Operator and good friend, Joe, had upgraded several of his autoracks with the new bottoms, and was happy with them. Years, ago, I had purchased several kits, but hadn’t installed them, so the project lingered on the to-do list for a long time. In December, I decided that the time had come to complete the upgrade.
The instructions say to cut out the original bottoms with a jeweler’s saw, but that did not work very well for me – the blade kept wandering and my cuts were not straight. I decided to remove the carefully bottom with a box cutter blade. I drilled holes in the corners of the cars, then repeatedly (carefully!) passed the blade along the wall/floor joint until the plastic was cut through. A little bit of filing on the corners and edges and VOILA! the car was ready for the new floor.
The floors were easily installed using CA and accelerator. You need to be careful to not bend the floor or it will tilt the later-installed coupler up or down.
I have upgraded about 12 of the autoracks, with ten or so more to go. A few have couple alignment issues, which I am dealing with on a case by case basis using styrene shims. The time invested in this project has need significant, so much that I question that the results are worth it. Although a complete upgrade to MicroTrains of Red Caboose autoracks (which are AWESOME) would cost nearly $800. I guess a bit of my time is worth $800.