New project - the RS3m
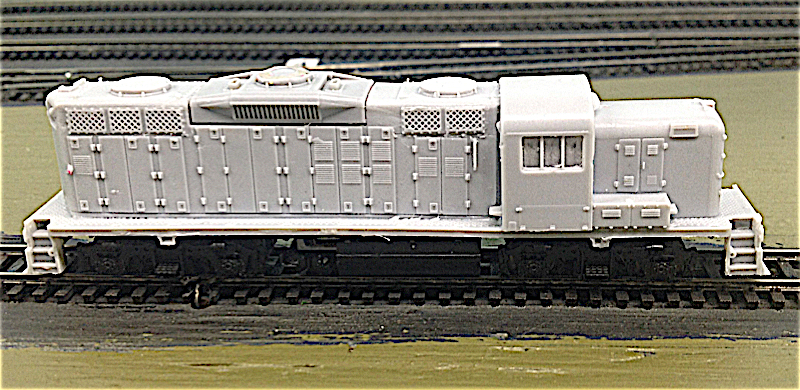
I just received this resin shell of the Katy's RS3m locomotive. I'm not much of a modeler/painter/builder, etc., so this will be a long-term project, I'm sure.
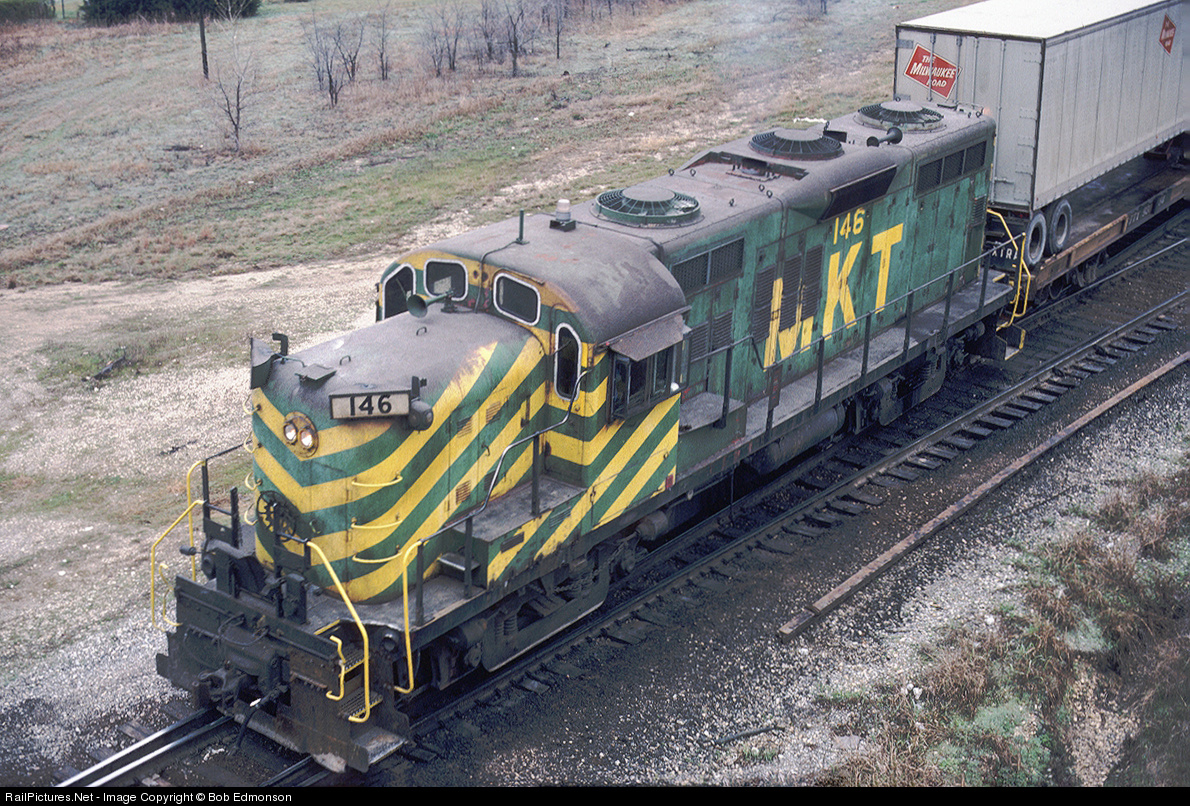
Katy's fleet was originally built in the early 1950s by ALCO. The Katy had them rebuilt in the late 1950s by ALCO competitor, EMD, who rebuilt them with GP9 long hoods to make room for the larger EMD 567 prime movers.
.
More dang trees!
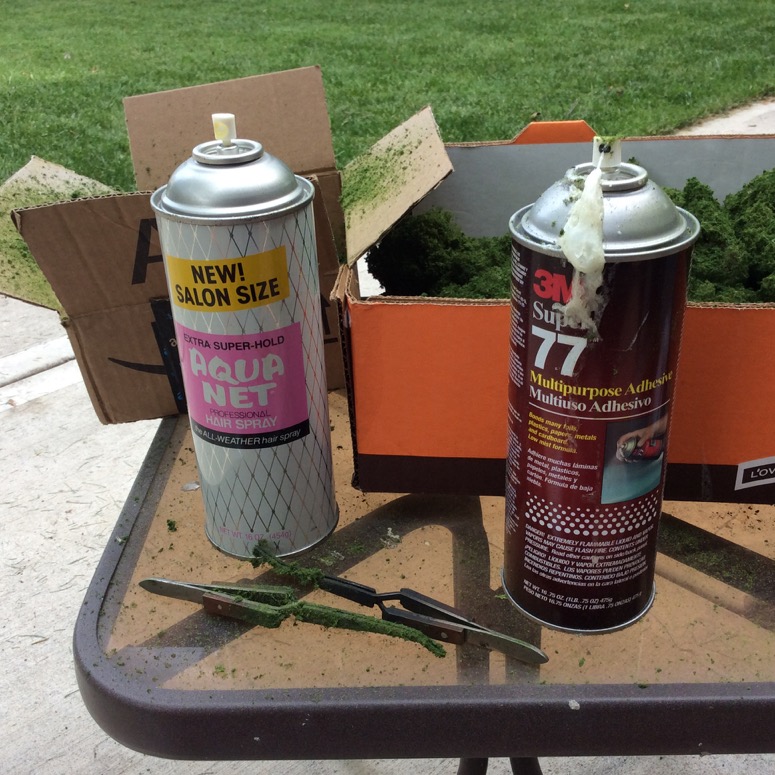
Tools of the Trade (if your trade is tree-making)
Today's calm, windless weather made for perfect conditions to make layout trees. Since spray adhesive is involved, any wind creates havoc and gets adhesive all over everywhere!
I had previously made up a couple bags of "tree balls", and I had recently purchased a healthy supply of Woodland Scenics "medium green" coarse turf, so I was good to go.
It's not too bad as a one-person operation:
- put on your Dr. Jellyfinger gloves (not required but you thank me if you use the gloves. Cleanup is SO much easier)
- place your supply of trees, a container with plenty of ground foam, and a big open box or box lid within easy reach. The box lid is to contain the finished trees
- with one hand, grab a tree ball with the long tweezers (these tweezers are going to get covered with glue and ground foam, so I dedicate a pair or two for the task)
- with your other hand, spray the tree ball with the spray adhesive (I use 3M Super 77, but I have also used cheap black paint in the past. The spray glue works mo' betta'). I try to not spray the area around the tweezers too much.
- keeping the tree ball in the tweezers, place the adhesive-coated ball into the ground foam. Set down the spray can and gently dribble foam over the ball with your free hand. You can completely coat the ball in a couple of seconds
- Tap the tweezers against the side of the foam-containing box or rap with your free hand to dislodge any extra ground foam not held in place by the glue
- Move your tweezers over the box lid, open the tweezers slightly to free the foam ball, and push the ball off the tweezers with your free hand
- pick up another foam ball with the tweezers, grab the spray can with your free hand and repeat until all the poly fiber balls are gone!
Be mindful of where you are spraying the glue, there tends to be a bit of overspray, and it will get on things your don't intend, if you are not careful.
The tweezers will slowly accumulate an increasingly thick layer of ground foam. Scrape it off periodically.
You can 'plant' these trees on your layout using the same spray adhesive or hot glue. I prefer the hot glue, because the spray glue does have that overspray and can settle on things like track and other scenery. Hot glue is fast and I find it very convenient. Get a quality hot glue gun (Elite Operator™ tip! Hot glue is HOT! Be careful not to push your fingers into a pile of molten glue when placing the trees. It hurts like heck. Ask me how I know!)
Now, go forth and create that forest you've been dreaming about.

Trees ready to be planted!
Turtle Envy
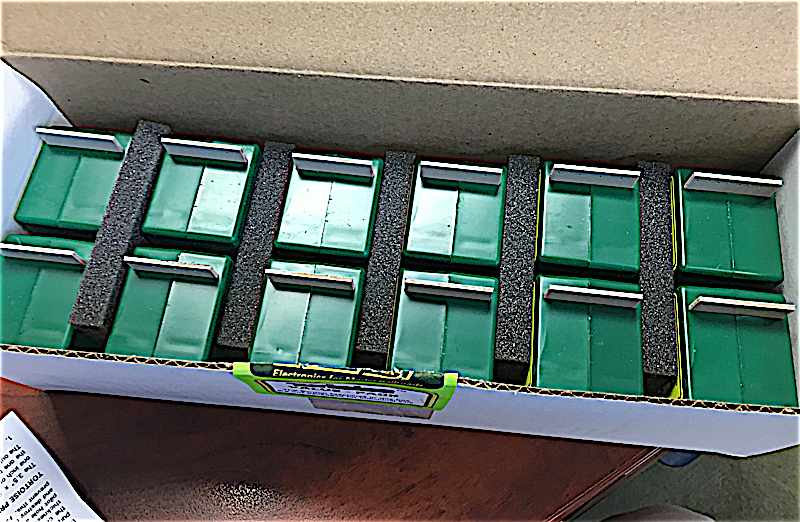
The awesome sight of 12 brand spanking new tortoise switch machines!
The postman was my best friend today - he dropped of a box containing a dozen shiny new Tortoise switch machines! Christmas in May!
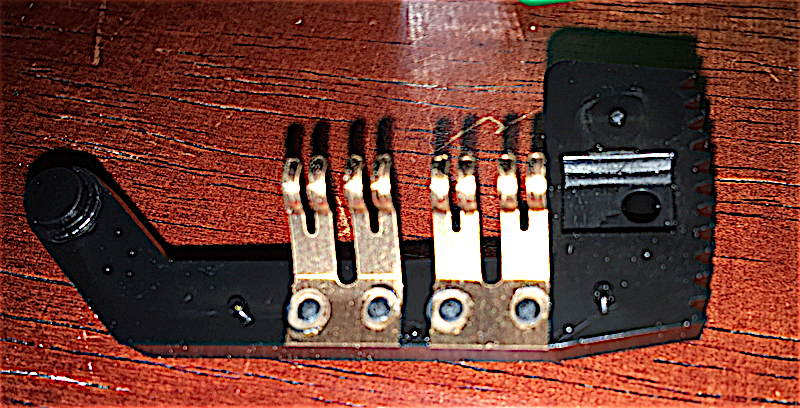
So I promptly did what EVERY Elite Operator™ does when he gets a new tortimus - crack then all open and increase the pressure on the springy electrical contact thingy!
Parsons Yard is coming ALIVE!
The Parsons Staging Yard ladder on Joe's Burlington Northern, Marais Division
It's TRUE! Parsons Yard will soon be operational, and filled with lusty semi-sweet green locomotives pulling manly freight and pig trains.
Not on the Mighty MKT, but on the next best thing - my buddy Joe's awesome and massive Burlington Northern Marais Division. I'd prefer to call it the "Missouri-Kansas-Texas, Kansas City Subdivision (with a few BN trains, too)", but Joe says no. I'll keep working on him about that name.
Joe models the Burlington Northern, circa 1987, and has included the MKT junction at Paola, Kansas. Katy trains come onto the Marais Division at Paola and run into Kansas City. Most MKT trains will terminate at Glen Park Yard (south of Joe's big Murray Yard), but one train, the Houston Chicago Express (the HCX or "the Bull") will continue on into a staging track located near 10th Street. This hot train would typically be handed off to the CNW at Kansas City and proceed on to Chicago.
Today, Joe built the 4-track Parsons Staging Yard, installing his amazing Kasper MK VII, Rev 2 turnouts. The turnouts will be tortimus powered and driven by a Kasper Version 4 Diodifier™ matrix actuator with the optional LED visual indicatifiers, Joe is truly an Elite Track Layer™
Joe is also working on the design of Glen Park, and it's like trying to stuff 10 lb of potatoes into a 5 lb bag. Soon, lovely sight of Katy locomotives growling up the hill at Paola will accompany the ejaculation of excellence that is the BN Marais Division.
R.I.P. Hodor!

HOLD THE DOOOOOOR!
HOLDTHEDOOOOR!
HOLDTHEDOOR!
HOTHDOR!
HODOR!

If you've been following Game of Thrones on HBO, you know what I'm talking about…(sniff)
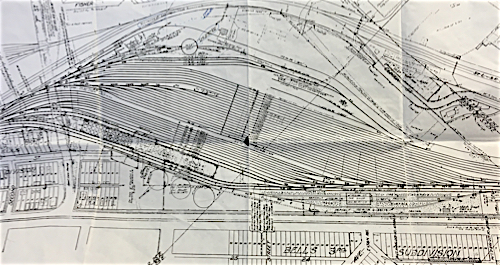
The Bryson Connector? Nope - The Osage Division
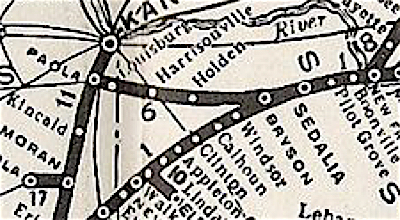
This is from the 1944 MKT System Map
Does anybody know anything about the track from Bryson, Missouri to Paola, KS?
This is from the history section of the Sedalia Depot Web Site:
Also in 1895, the MKT completed another new line from the St. Louis mainline at Bryson (north of Windsor) to the KC mainline at Paola, KS. This line was envisioned to serve as a through connector route for traffic between Kansas City and St. Louis, though its rather circuitous route made for long transit times and prevented the MKT from competing seriously in the trans-state rail market.
UPDATE!
Google is your friend. A few clicks into a search on the Google and I came up with TONS of info on the Osage Division of the MKT! (It was on the internets, so it must be true!)
This is from AbandonedRails.com:
The Osage Division of the Missouri, Kansas, and Texas (MK&T or Katy) Railroad began as a railroad known as the St. Louis and Santa Fe Railroad, Missouri Division which was incorporated on April 20th, 1869. Completed in 1871, the railroad was a single-track, standard gauge steam railroad that ran approximately 38 miles from Holden, Missouri (In Johnson County) to the Missouri/Kansas state line. As St. Louis and Santa Fe Railroad, Missouri Division quickly went bankrupt; the Katy Railroad officially completed purchased the charter on May 29th, 1872…
However, the connection to the mainline of the Katy did not ensure survival and the Osage Division (also known as the Holden & Paola line and possibly the Holden Division) closed in 1958. Today, the site of Bryson is marked by a sign on the Katy Trail with no mention of the Osage Division's existence. This portion of the Katy Railroad is not a part of the Katy Trail system in Missouri and was returned to the local residents, most of the railbird has been destroyed.
You gotta love the Google!
UPDATE #2!
I did a bit more research and ended up creating a page on this web site dedicated to the Osage Division.
Tres Chiflados
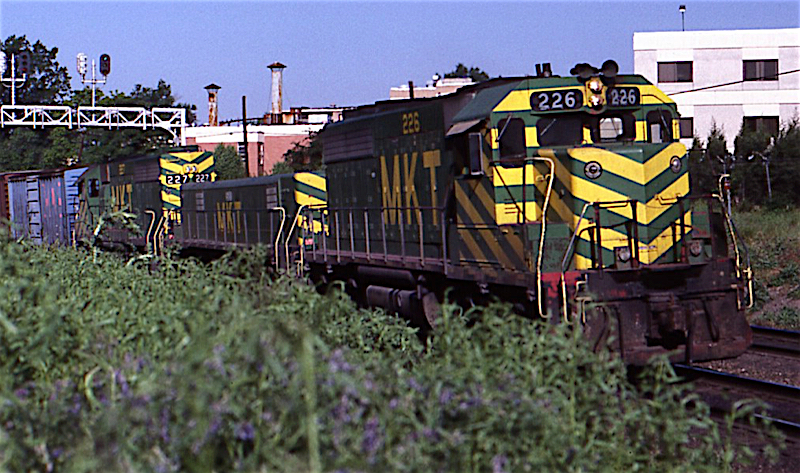
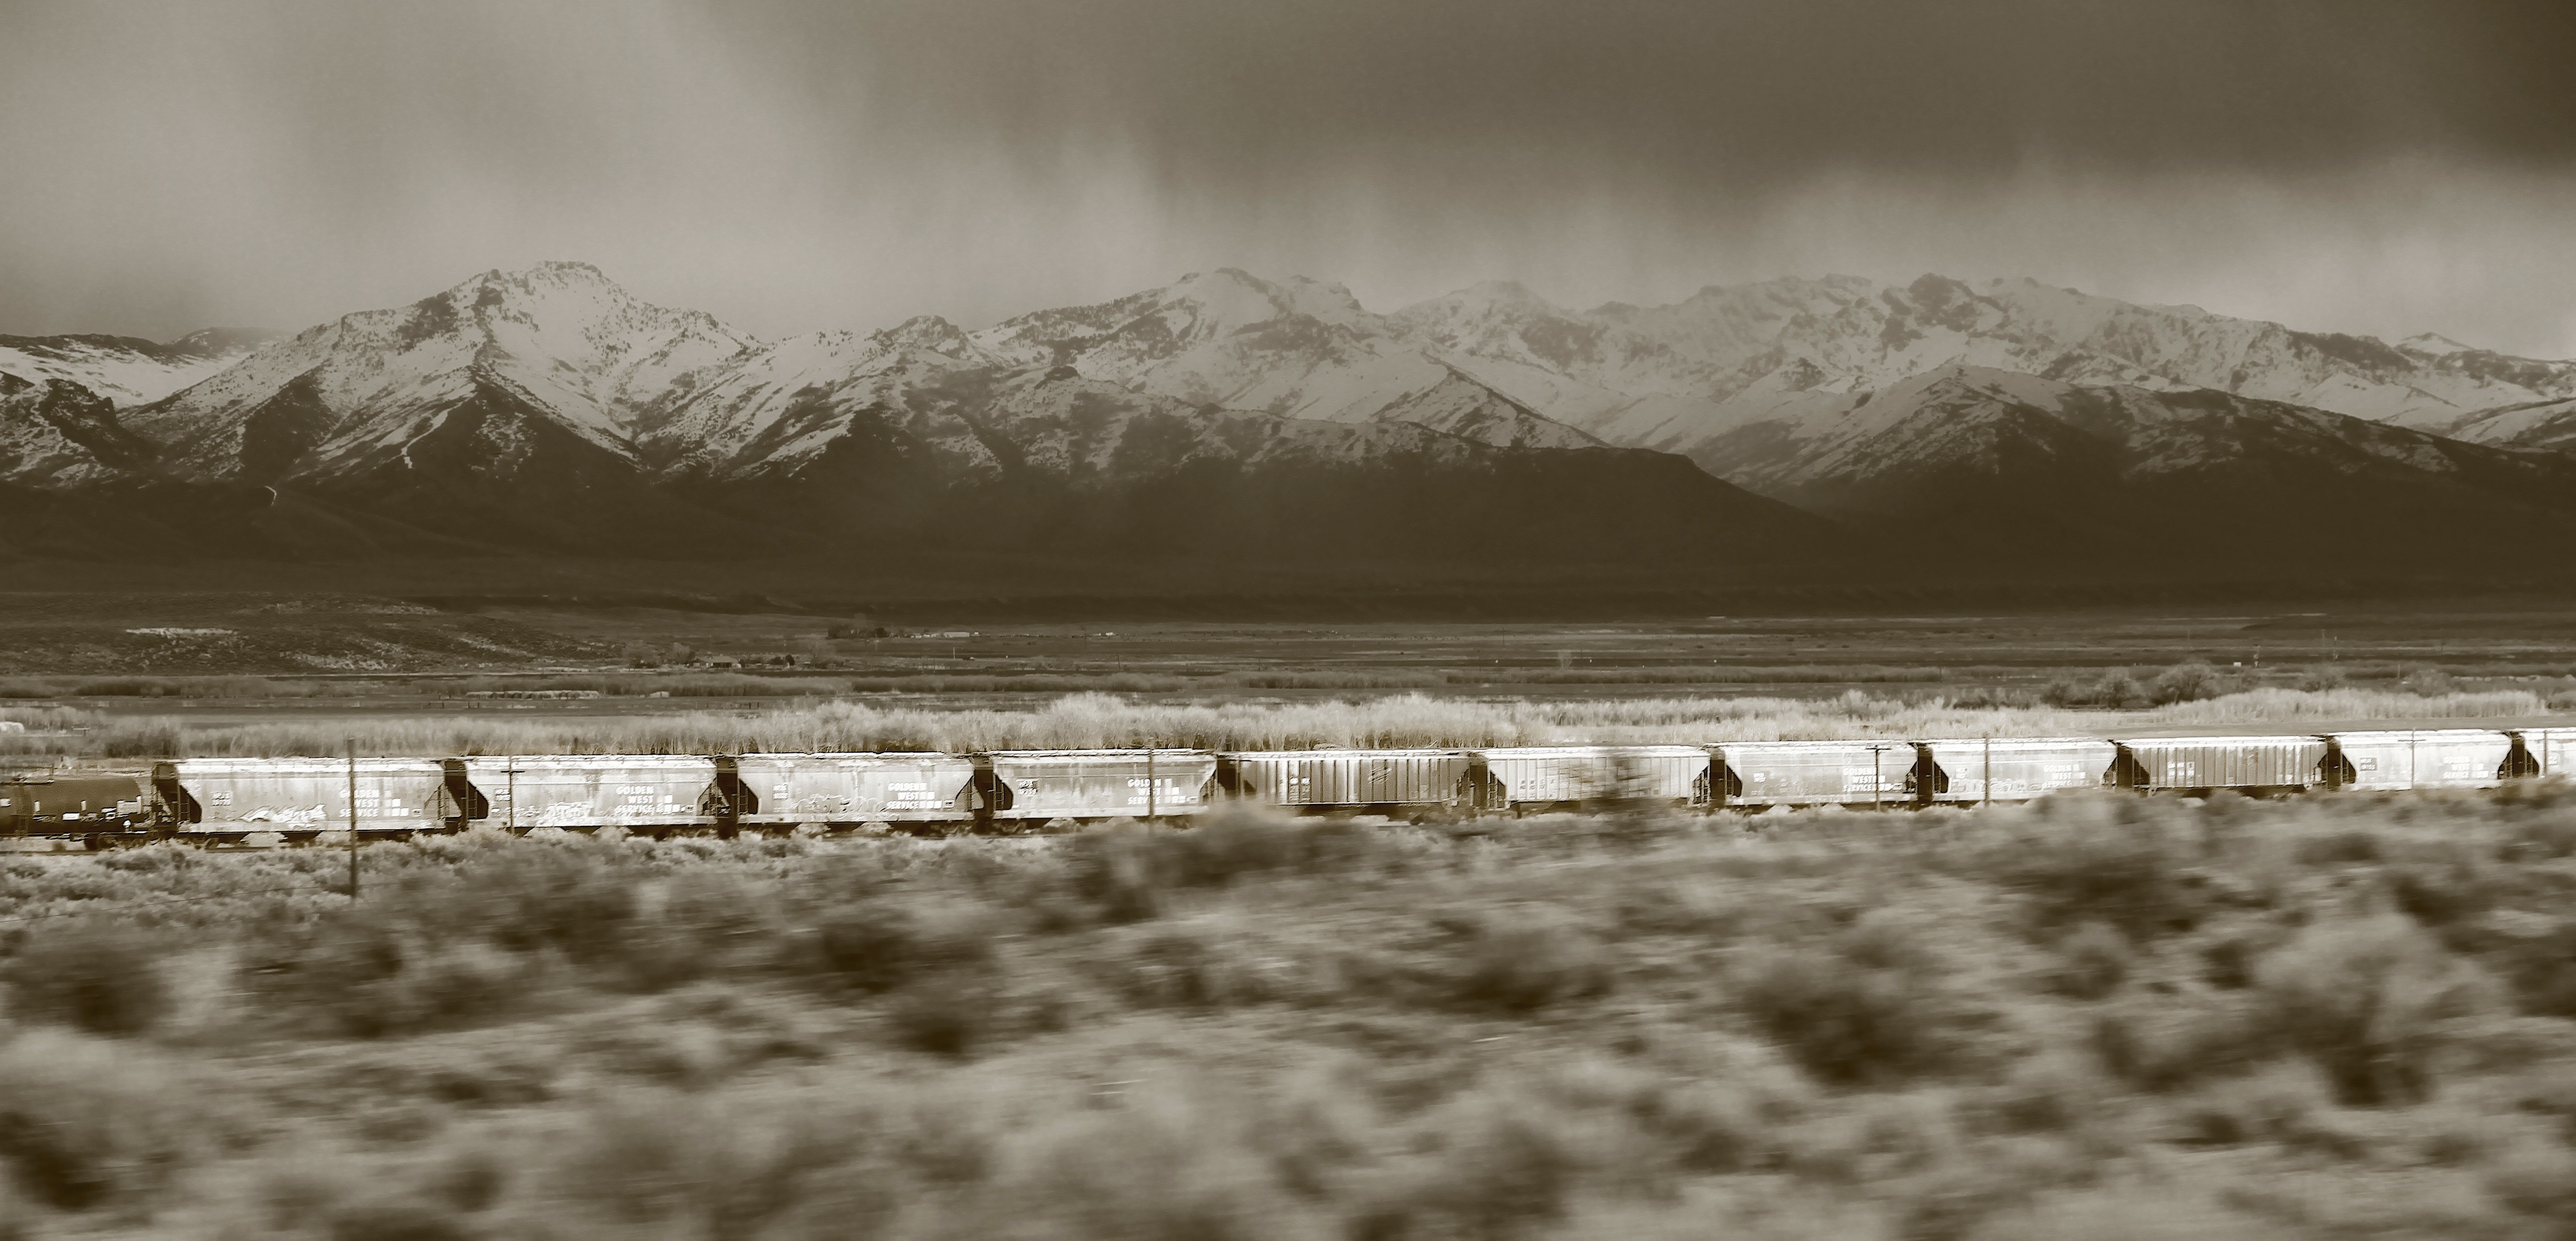
The Three Stooges in 1988.
This threesome of two GP40s (#226 and #227), separated by road slug #501, operated system wide as a single unit that was never parted except for heavy maintenance and had been christened "The Three Stooges" by train crews.
According to info from the MKT Yahoo list, the both 226 and 227 were set up as mother units, meaning that either could supply electrical current to the slug's traction motors, but it did not need both units in order to operate. The 501, having m.u. connections at either end, could still be used in any consist as long as either the 226 or 227 was with it.
MKT slug #501 was built from wrecked GP40 #222 in 1982 at the Parsons, Kansas shops.
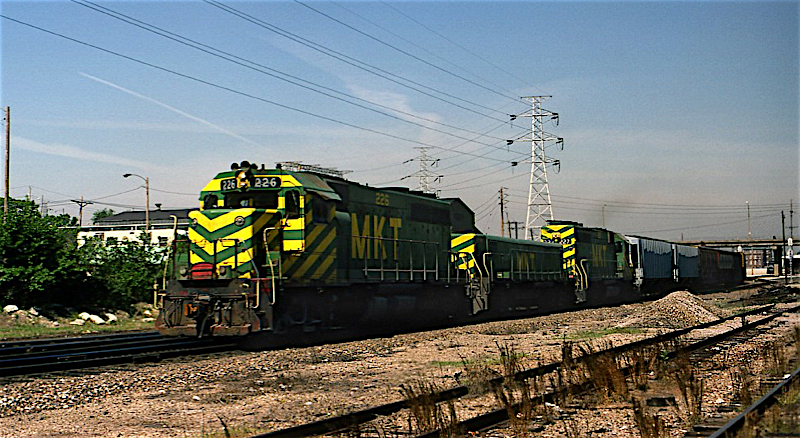
The three stooges in St. Louis in 1988
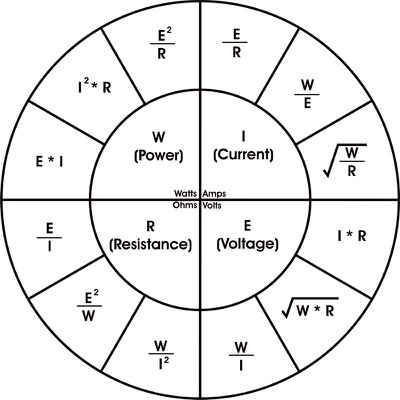
Series vs Parallel Resistors
And, while we're at it, here's an Ohm's Law cheat sheet that I've often found useful:
Piggy Packer Picked a Peck of Pickled Peppers
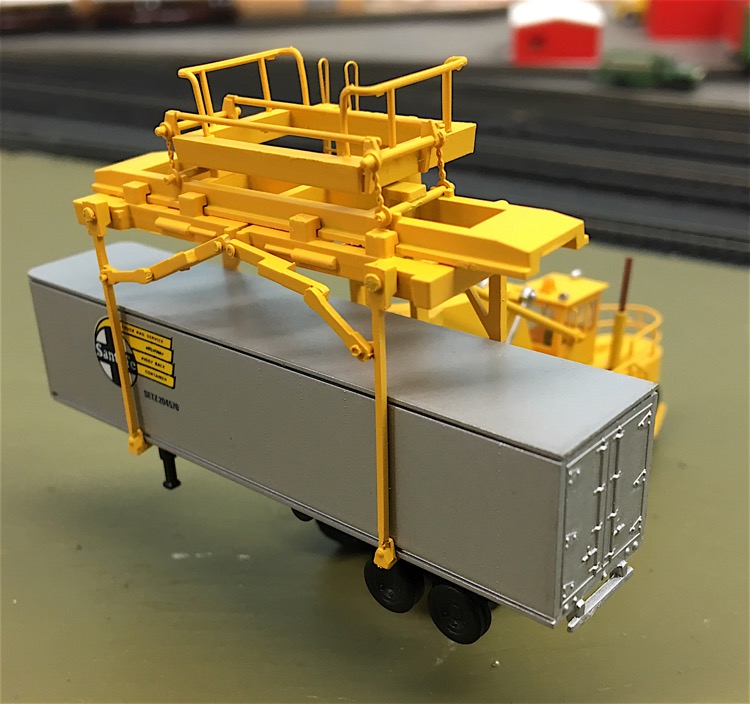
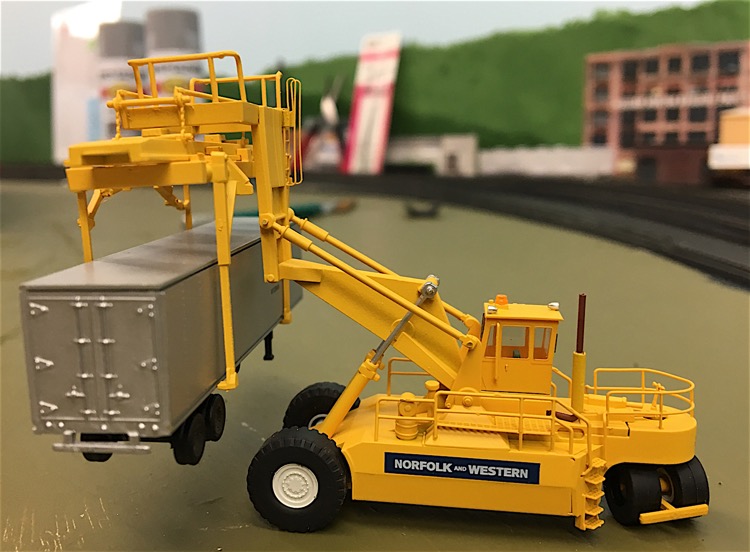
This thing arrived fresh from eBay the other day, and all I can say is it is GORGEOUS! What a great model - incredibly detailed. It's a Piggy Packer, which was used to load trailers and containers onto flat cars.
The model comes fully assembled from Wheels of Time (although mine arrived from eBay with both real wheels broken off - a quick fix with superglue and kicker).
I don't know much about the prototype. This is from the web site:
The PC-90 is a big machine. The front tires alone stand seven feet tall. The operator sits over 13 feet off the ground with an excellent view of the loading and unloading operation. Hydraulically operated boom and lift mechanisms make this machine very durable and robust. The Piggy-Packer typically loads an average of 12 trailers or containers per hour on to piggyback flat cars.# They come equipped with a spreader and bottom pick that handle both trailers and containers. In top-pick mode, they're able to stack containers three-high. The PC-90s could optionally be equipped with a spreader for lifting containers only.The PC-90 is powered by a Cummins NH-855C-250 6-cylinder diesel engine located under the operator’s cab. The Cummins engines have a four-speed transmission designed for maximum torque. They have a maximum rating of 250 HP at 2100 RPM. The PC-90 weighs over 80 tons and has a maximum speed of 27 mph ... not exactly swift.
It says that the machine was in operation from 1968 to the present, so it is chronologically correct for my 1984 time period. Alas, the MKT did not have any of them. But I'm invoking "Rule 1", and will place this model at the pig ramp (now a TOFC facility!) at the New Franklin Industrial Park. It will get some weathering and the "Norfolk and Western" marking must go, but generally, she is good to go for the layout!
New Pavement for Safety Kleen
Safety Kleen at East St. Charles
(right click and open to embiggen)
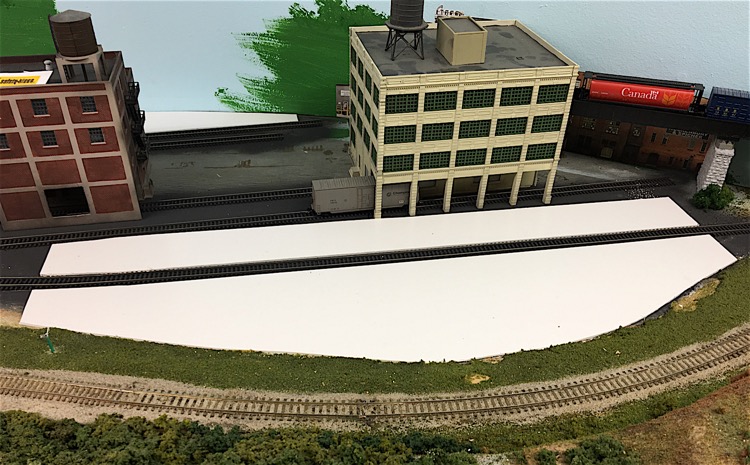
Tonight was Thursday work night, my favorite night of the week! Steve came over and we started the scenery upgrades for Safety Kleen, a tidy industry nestled along a bend in the tracks at east St. Charles.
Safety Kleen is a spent oil and liquid waste transfer facility modeled after a similar oil transfer facility in Olathe, Kansas, served by the BNSF (on the former ATSF track). The industry is very simple - a spur track with room for three tank cars. A big paved parking lot to allow semi-tank rigs to maneuver. Simple spill pads at the car spots. Security fencing.
We used Sintra PVC board for the paved area. Sintra is a rigid, but lightweight, closed-cell extruded PVC board with generally a low-gloss matte finish. It is used a lot in the sign industry. You can cut it easily with a knife or razor blade, and I've been told that the thicker sizes cut well on a table saw.
The basic forms for the pavement were established using masking tape on the layout, which was then transferred to the Sintra board. The board was then cut to shape, and fine adjustments were made with a wood rasp.
Later, we will lightly score the board to suggest concrete joints and paint it a light gray concrete color (Steve likes Testors 1233 - Flat Light Aircraft Gray) . The addition of details such as staining, cracks/weathering, some etched fencing.and a couple of LED security will complete the project!
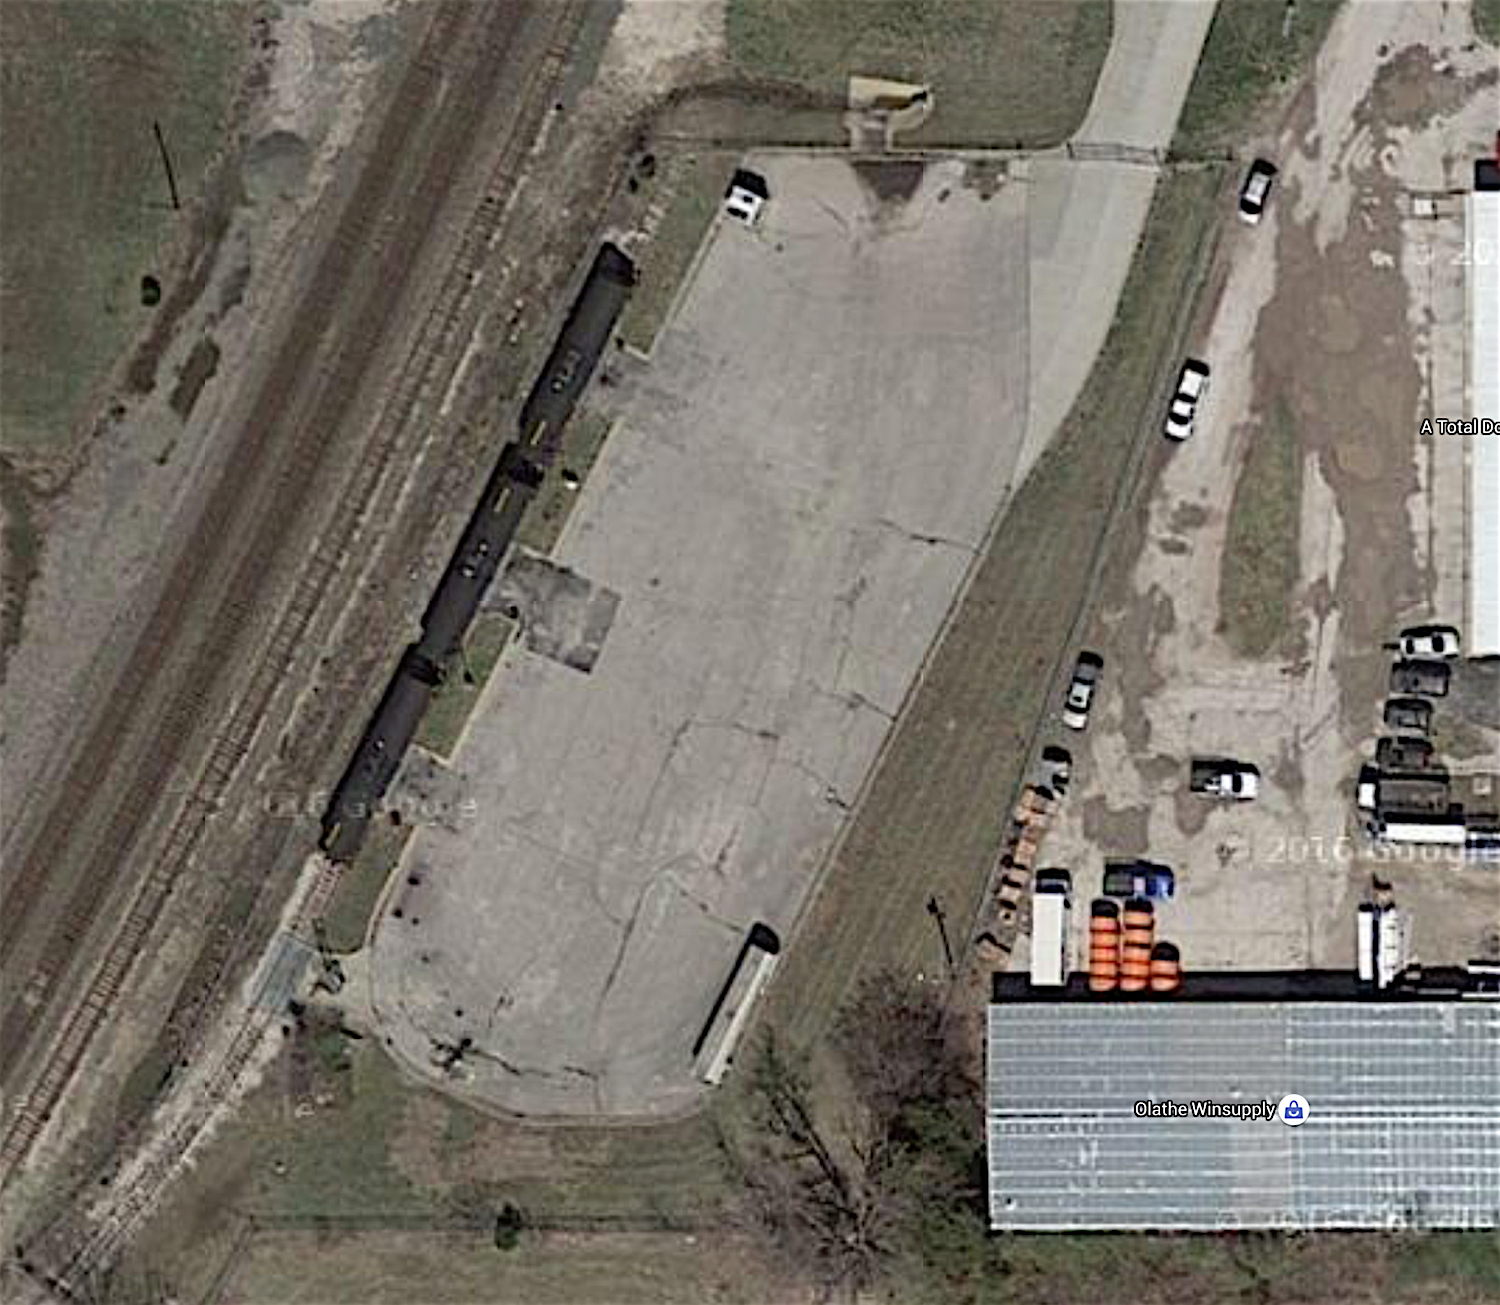
Here is the prototype industry in Olathe, Kansas. It's as simple a trackside industry as you could envision!
(right click and open to embiggen)
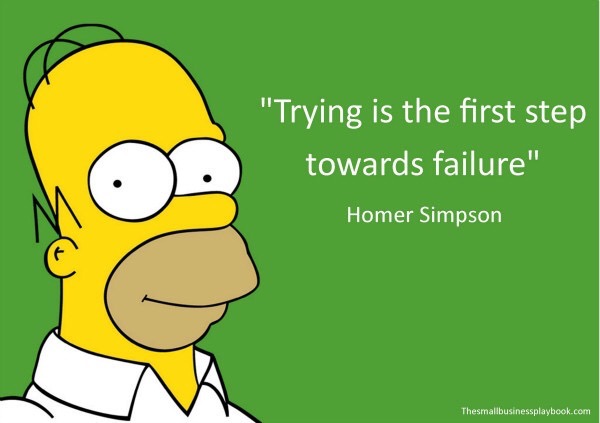
Deep thought for the day...

This can apply to model railroading, too.
New hack for the Boonville Job
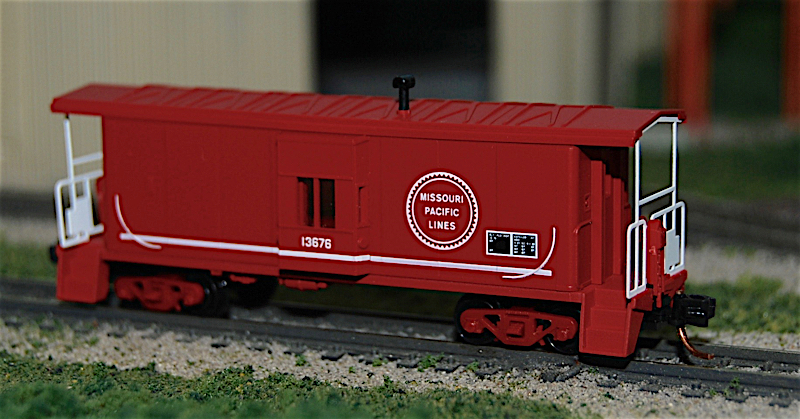
Recently arrived from eBayland is a new MP caboose for one of the Union Pacific Boonviile Job trains. Why a Missouri Pacific caboose on the UP train, you ask?
Well, I model 1984, and the MP was acquired by the UP at the end of 1982 (Google is your friend), and I figured that, way out in the middle of Missouri, they would probably still have a MP caboose hanging around. It helps tell the story of the Boonville job and provides from historical context.
It needs some weathering, especially those bright red trucks (yikes!). But it is a welcome addition to the Mighty MKT!
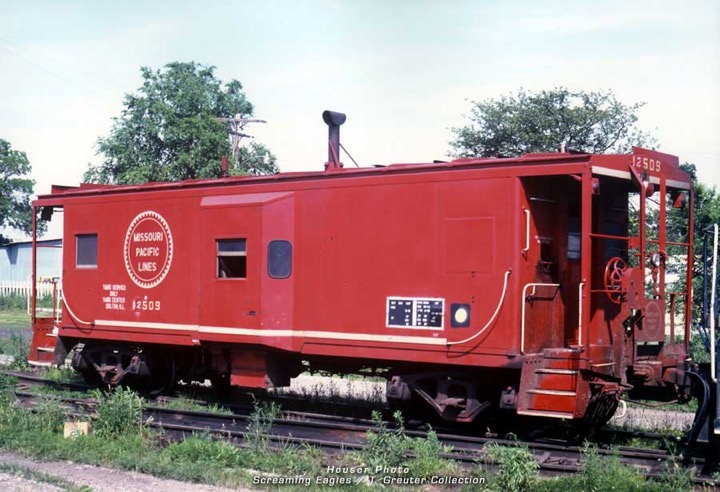
Here is a photo of a prototype MP caboose, about 1980:
Killing three birds with one stone
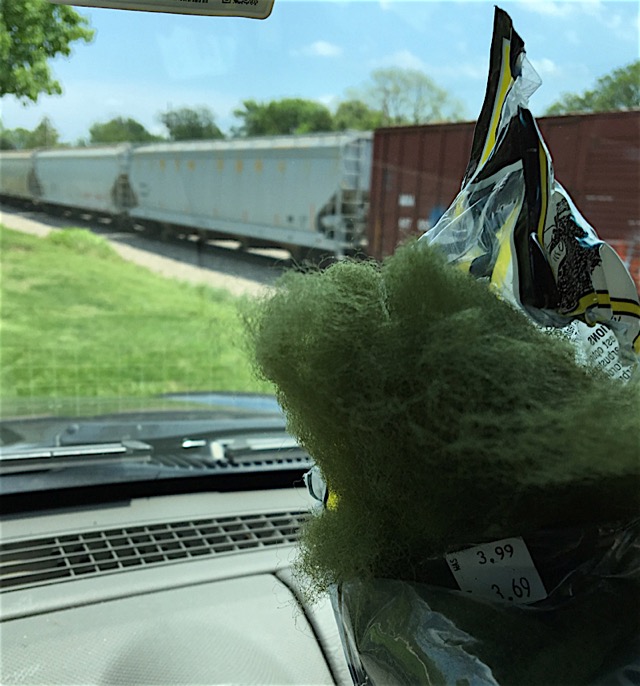
Eating lunch, watching trains, and making polyfiber trees
Today, was a Wednesday, a typical Wednesday. I did get my windshield replaced on the Jeep, so I guess that was not particularlly typical.
But what was typical was that I spend the lunch hour down at the depot (in old town Lenexa), hoping for a train or two. As as I often do, I pull out a bag of Woodland Scenics polyfiber and form tree structures. OK, we call them "tree balls". I was trying to be classy.
A bag of polyfiber goes for about $4 with tax, and it will make about a plastic bag full of tree balls. That may seem like a lot, but they go pretty fast on the layout.
Since I model the northern Ozark Highlands, my layout needs trees. Lots of trees. A BUNCH of trees. So I am very familiar with the polyfiber tree-making process. Buy some polyfiber. Open the bag and gently unravel the big pieces contained therein. Pull off a palmful of fiber, and tease it repeated to increase the volume. Gently roll the expanded fiber into a vaguely round shape. Place tree ball into bag. Repeat.
Later, I will do the spray adhesive and ground foam part, but for now, it's pull, tease, shape, deposit, and repeat.
It's a perfect activity for those times where you've finished your sack lunch and you are waiting for trains to come along the old Frisco main in Lenexa. I can usually complete an entire bag before my hands get tired of pulling and rolling, so I make it a goal to complete the bag before I drive back to work. At the end of the day, the sack o' balls goes in the house and down to the train room for future conversion into backdrop trees.
So, the Elite Operator™ tip of the day is: Keep a few bags of polyfiber in your car. You never know when you can knock out a bag or two of tree balls!

A bag o' balls, ready for spray adhesive and foam!
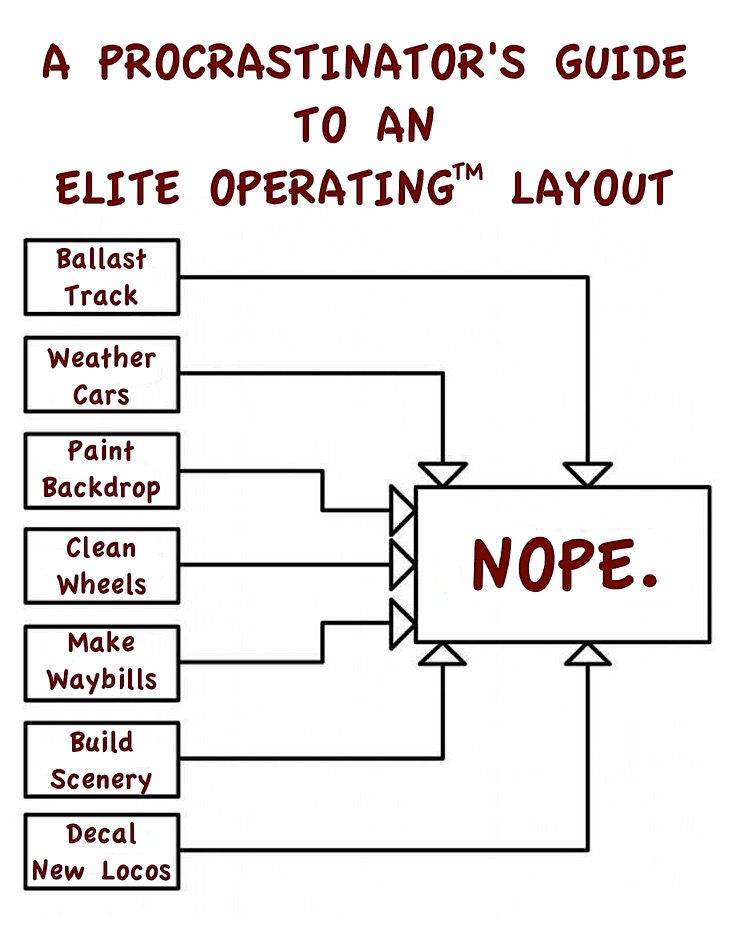
Lazy - there's just no other word for it!

Despite hours spent in the basement, I have accomplished NOTHING on the layout this past week.
Ugh!
Modeling is like cooking
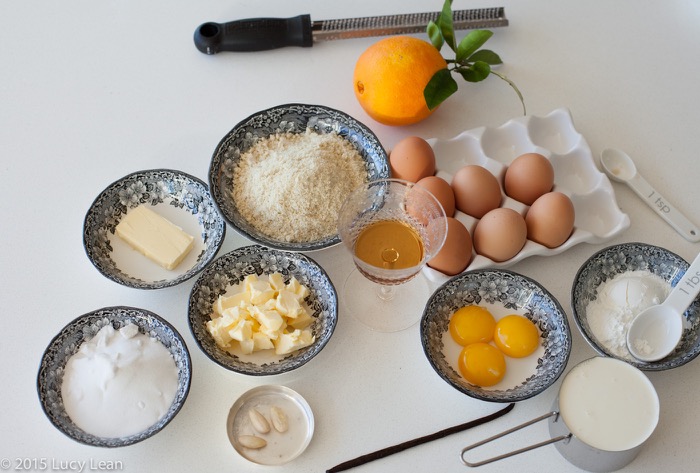
Another area of great interest to me (which is obvious if you’ve ever seen me) is eating delicious food. And preparing delicious food. As we modelers often look to develop techniques and skills to make the hobby more enjoyable, so does cooking involve learning skills to make cooking more efficient. One of the cooking techniques that I’ve found useful in BOTH cooking and modeling is the concept of mise en place.
In French, mise en place means “putting in place”. As it is used in preparing food, it is the concept of gathering all the ingredients and tool needed to prepare the dish or meal before starting to cook. And implicit in that process is that you take to time to think through the process to know what items are required.
How many times have you started a project (let’s say scenery) like this: You pull out the ground foam and start to sprinkle it on the area. Then you need some diluted white glue, so you put down the shaker and go get the box that has the white glue, but then you need to go to the sink to add water and DARN! you need to add a drop or two of dish soap to reduce surface tension, and the soap is upstairs. So you trudge upstairs to get the soap and mix the diluted white glue. Then you decide that you went to mask off an area so that it won’t get scenery on it, but the roll of tape is in the garage, so you make another trip upstairs. Then you want to add some burnt grass foliage to tone down the bright green and “Where did I put that burnt grass applicator?” So you stop everything and rummage through all your boxes of scenery material until you find that parmesan shaker of burnt grass stuff.
By the time you get any scenery work started, you are exhausted and ready to spend your night watching Netflix instead!
With just a little bit of planning, you can think through the task, and gather the materials that you need before you start.
Mise en place can be seen as an organizing philosophy that you can apply outside of the kitchen to almost every aspect of your life.
This is not a new or foreign concept to us. When you set aside all the things you need to get out the door in the morning, that’s mise en place. When you follow an evening routine with your kids (e.g., bath, books, bed), that’s mise en place too. When you gather your modeling tools and material that you need to start or complete a new structure for the layout — yup, mise en place.
An important part of mise en place is cleaning up as you go, and completely cleaning and organizing your tools after the project is completed. This makes it easier to find the tools when they are needed for the next project. This is especially important in a commercial kitchen, where multiple chefs are using community cooking tools. Similarly, in the hobby this post-project cleanup and organization can be important if you host work nights or have multiple people working on your layout. Even as a lone wolf modeler, having the tools put back into their proper location make it easier to start the next project, whether it be tomorrow night or next week.
Author Dan Charnas says it’s about working clean (Work Clean is the title of his new book all about mise en place):
Mise en place is not about making things tidy, it’s not about things looking clean. It’s about being able to work clean, which implies motion. The system has to be returned to order. So it’s not just about creating order, like, “Oh, look how I arranged my desk,” it really is about, “I’m going to move through all these projects, but I’ve also made the commitment to myself that when I’m done with this project I’m going to wrap it up.” I’m either going to deliver it or I’m going to put myself in a position where when I resume it, everything is in a place for me to pick it up. Because that’s going to save me 20 minutes, I can use that 20 minutes to do other kinds of work or I can use that 20 minutes to be with my kid and read him a story.
Give it a try next time you head to the basement for a night of work on the layout. Take a moment to think through the task, gather the proper tools, and watch the magic happen!
But is it "Modeling"? Part 2
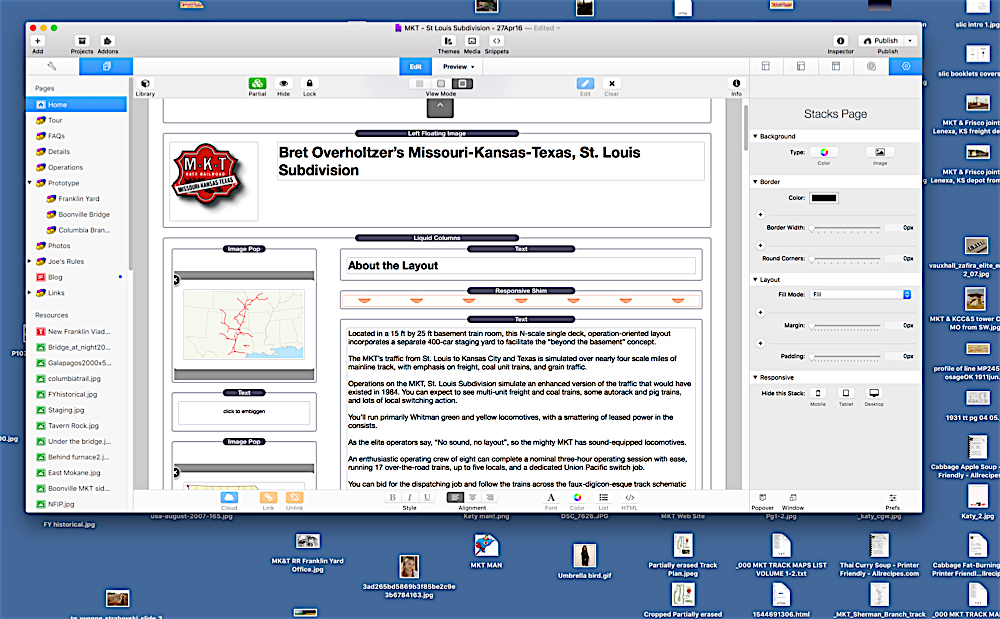
So I spent another night on train-related activities tonight, but I didn't go into the train room. In fact, I didn't even go down to the basement, where my work bench and all my "train stuff" is located. But I did 3-4 solid hours of work on the hobby.
I spent (yet another) entire evening working on the Web Site (yes,this web site). I revised the discussion on operations (still not happy with it), added a link to a cool paper on the New Franklin Viaduct (a future modeling project), and generally tidied up several pages. So, does this count as "modeling"?
I know that if you are working on your NMRA Master Model Railroader, a web site can count toward partial credit for the Author Achievement Award, so somebody finds value in the work. But I wonder, as the owner of a layout with a lengthy layout to-list, whether this evening is "wasted". I wonder whether the time would have been better spent doing "real" work on the layout - applying ballast to Tavern Rock, or tackling the long-delayed yard ballasting project (yikes!).
I refuse to consider it a waste of time, as I really enjoy working on the web site and, after all, the hobby is supposed to be enjoyable (at least that's what I keep telling myself, especially when I'm hosting an operating session). But still, any time spent on the web site is time not spent on the layout.
The fact that I can sit on my a$$ all night and click a mouse or type a bit, coupled with the fact that I'm an inherently lazy person, make the prospect of a night behind the computer attractive. But, just as a person can't get their nutritional needs met by eating only dessert, nor will the layout get built by creating a fun (hopefully) and informative (hopefully) web site.
So, I make this promise to myself. Tomorrow night, after supper, I will get directly to the basement and install those LED street lights in East Rhineland that have been on my list for weeks!
I PROMISE!

Selective Compression?
The layout of the Prototype Glen Park Yard, in Kansas City, Kansas
My buddy Joe has a dilemma. But it's a good dilemma. He needs to fit Glen Park Yard into the space he has delegated for it on his AWESOME Burlington Northern, Marais Division.
And of course compromises need to be made. We Elite Operators™ call that Selective Compression. The goal/challenge is to compress all the yummy goodness and essence of the yard into the available space. It's an age-old problem in the hobby.
You need to determine what can be omitted or made smaller and still keep the flavor of the scene you are looking to model.
Examine the overall scene. What is outstanding and makes it unique to you? Take those elements, shrink them a little, and you will likely get the flavor of the are you are looking for.
Multiple tracks - people don't usually go out and count the track, so a reduction in the number of tracks is an easy fix. If you are modeling a yard or industrial area, pick out the prominent buildings, industries, or scenic elements that make the area unique. For example, at Glen Park, the Bunge Elevators on the south side of the yard are the most prominent structures, so they should stay in some form. Just use fewer of them or make the scene have a smaller footprint.
It's a bit of an art, but with careful planning, and Joe's usual awesome track work, I am sure that he will soon have a rocking' MKT yard on his layout.
I CALL THE KATY JOB!!!
Ever have one of those days?

It's a Sunday, and I'm having one of those "I can't get ANYTHING done days". Weekend, actually, as this funk started Friday night.
I have a long list of projects, and I can't seem to make any progress on them. I've printed a few new car cards, created a few new waybills., and added a few trees to the hill, but it is just a drop on the bucket of my multi-page to-do list. Ugh.
Maybe I'll just go for a walk and clear my mind. The to-do list will be there when I get back.