Led
Backdrop lights
Sep 14, 2016
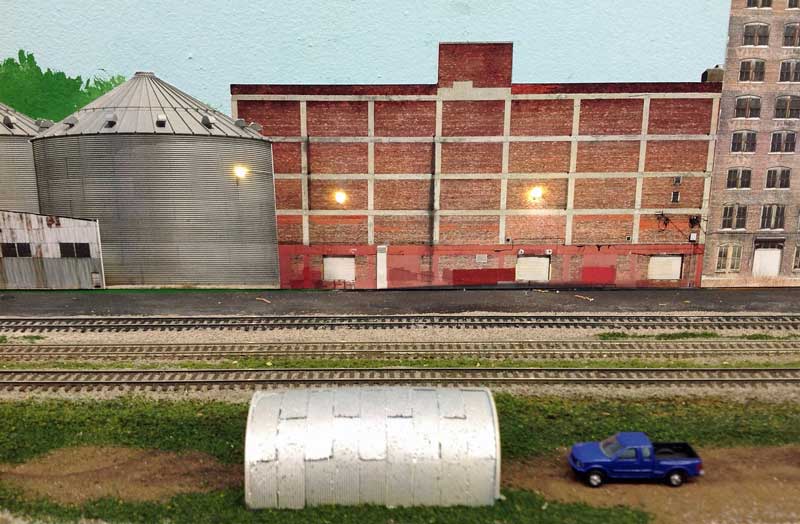
In several areas around the layout, I have photo-realistic backdrop flats, made from pictures of real industries around Kansas City, taken by my buddy, Steve. They add a great sense of realism to my industrial areas.
I recently added LED lights to the flats in St. Charles, simulating the security lighting that you would see in any industrial or urban area. Using very small. pre-wired LED, and adding magnet wire to the leads, a small hole was drilled into the backdrop. The LEDs were secured with a drop of CA glue, and the leads snaked down to below the layout. As per my usual lighting method (described on other blog entries), I made a bus for the wires and powered them with my 12 volt supply.
The effect is quite nice, and make the flats seem less 2-dimensional.
Adding lights at Rhineland and New Franklin
Aug 06, 2016
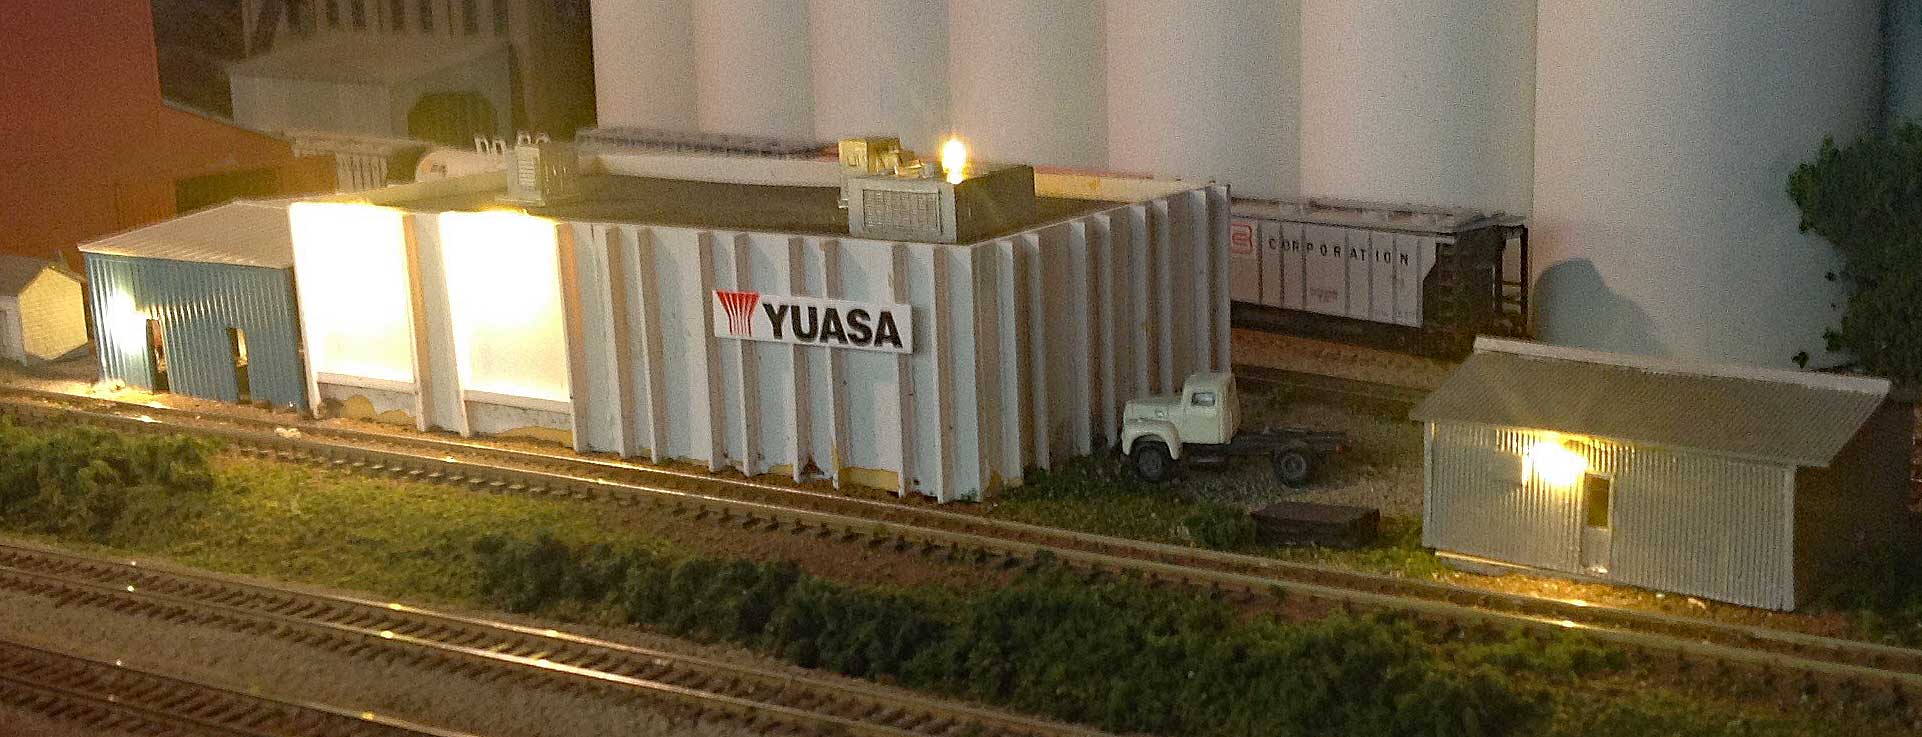
I dimmed the air conditioning light a bit and added a security light to the maintenance building on the right.
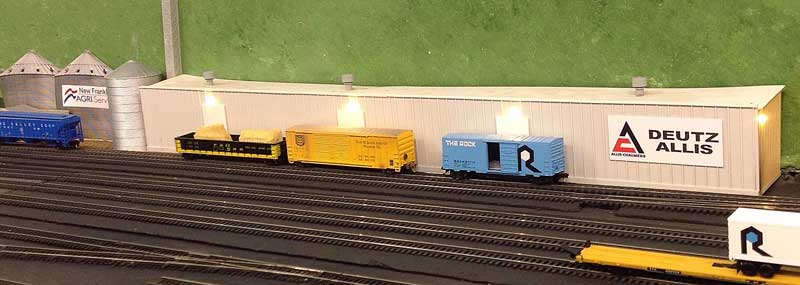
I also added lights to the Duetz Allis farm implement dealer at New Frankln. These are the smaller warm white LED with 2.2K of resistance (12 volt power supply). I really like the look of these lights, and may go back and dim some of the other lights I've recently installed.
Let there be (LED) light!
Jun 18, 2016
The last few days have been busy with some final projects before I start cleaning the layout in preparation for the N-scale Convention tours and operating sessions.
I wanted to add some lighting the ACF Car Repair buildings at East St. Charles.
The lights turned out great and I wanted to share my method for installing the LEDs. It's not rocket science, but you may find a tip or two here.
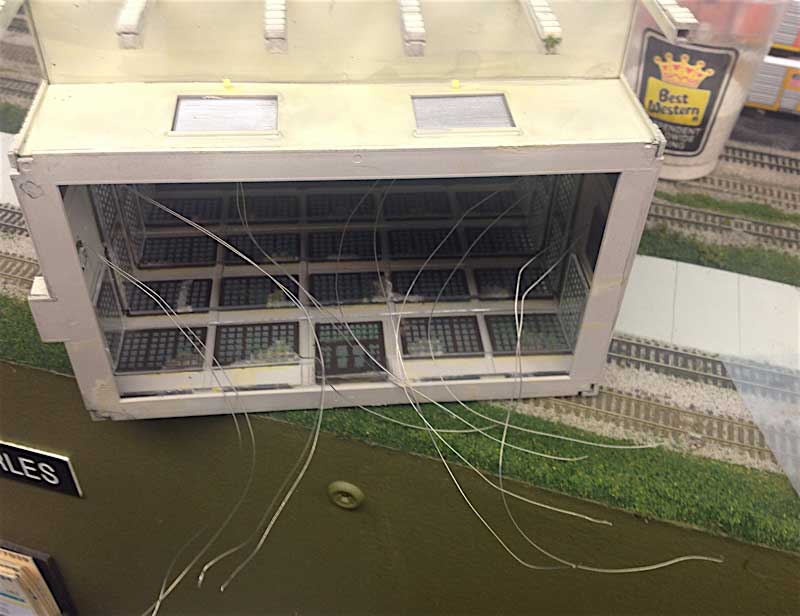
Step 1 - buy the pre-wired LEDs off eBay (free shipping from China!) and install in the buildings. I just drill a small hole at the location, thread the wires in and secure in place with a tiny dab of super glue. A quick shot of CA accelerator, and the LED is secure.
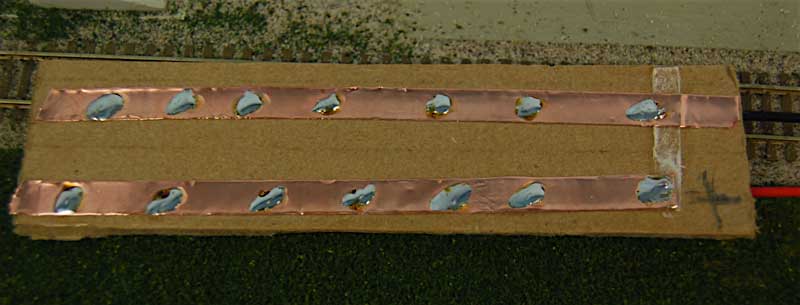
Step 2 - I make an electrical bus with copper strips that are used for stained glass windows. It has an adhesive backing and takes solder REALLY well. I also use wiring connector plugs (from eBay) that allow me to building these things at the work bench, then plug them into a 12 volt supply from under the layout. Both the positive bus and the ground bus are tinned where I will land the resistors and the wires.
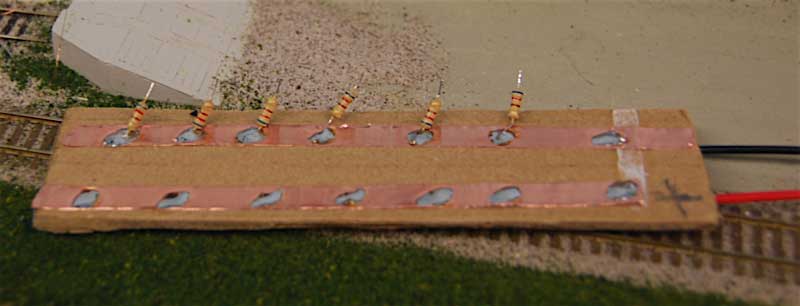
Step 3 - I trim the leads from the resistors and solder into place. The resistor leads going to the bus don't need to be tinned, but I tin the free ends, because it makes the next step a LOT easier. The resistors values have been selected to provide good intensity with a 12 volt supply.

Step 4 - I then tin the wires from the LEDs, being mindful of which wire is the positive (these are light emitting diodes, right, so polarity is important). I land the wires. At the positive bus, the wires attach very easily and quickly. For the resistor side, I use the "Kasper paralllel soldering method", where the two wires are tinned, held parallel, heated simultaneously, then held precisely in place while the solder cools. This technique requires a steady hand, and tinning the wires beforehand is crucial. I'm getting better at it.
Elite Operator™ tip! It doesn't matter if the resistors go before the LEDs or after the LEDs in the circuit. Just sayin'.
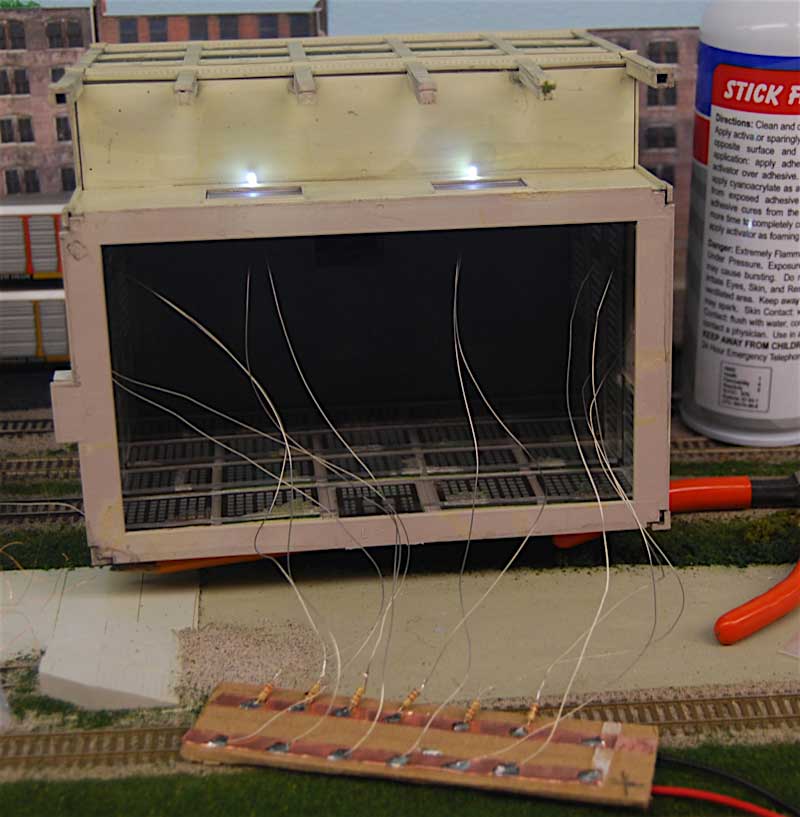
Step 5 - Test the wiring (I have a battery pack with a connecting plug to help with this step.
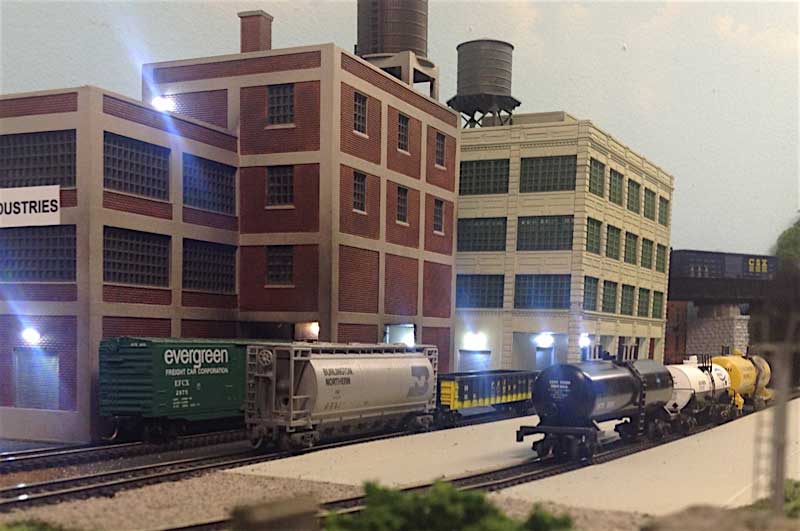
VOILA! Yummy lighting goodness! I think lighting really adds to the scene. These LEDs are cool white - they also sell a "warm white" version that I like a bit better. I may warm these LEDs up a bit with a dab of Tamiya clear tinted paint.
I wanted to add some lighting the ACF Car Repair buildings at East St. Charles.
The lights turned out great and I wanted to share my method for installing the LEDs. It's not rocket science, but you may find a tip or two here.
Step 1 - buy the pre-wired LEDs off eBay (free shipping from China!) and install in the buildings. I just drill a small hole at the location, thread the wires in and secure in place with a tiny dab of super glue. A quick shot of CA accelerator, and the LED is secure.
Step 2 - I make an electrical bus with copper strips that are used for stained glass windows. It has an adhesive backing and takes solder REALLY well. I also use wiring connector plugs (from eBay) that allow me to building these things at the work bench, then plug them into a 12 volt supply from under the layout. Both the positive bus and the ground bus are tinned where I will land the resistors and the wires.
Step 3 - I trim the leads from the resistors and solder into place. The resistor leads going to the bus don't need to be tinned, but I tin the free ends, because it makes the next step a LOT easier. The resistors values have been selected to provide good intensity with a 12 volt supply.
Step 4 - I then tin the wires from the LEDs, being mindful of which wire is the positive (these are light emitting diodes, right, so polarity is important). I land the wires. At the positive bus, the wires attach very easily and quickly. For the resistor side, I use the "Kasper paralllel soldering method", where the two wires are tinned, held parallel, heated simultaneously, then held precisely in place while the solder cools. This technique requires a steady hand, and tinning the wires beforehand is crucial. I'm getting better at it.
Elite Operator™ tip! It doesn't matter if the resistors go before the LEDs or after the LEDs in the circuit. Just sayin'.
Step 5 - Test the wiring (I have a battery pack with a connecting plug to help with this step.
VOILA! Yummy lighting goodness! I think lighting really adds to the scene. These LEDs are cool white - they also sell a "warm white" version that I like a bit better. I may warm these LEDs up a bit with a dab of Tamiya clear tinted paint.