Let there be (LED) light!
The last few days have been busy with some final projects before I start cleaning the layout in preparation for the N-scale Convention tours and operating sessions.
I wanted to add some lighting the ACF Car Repair buildings at East St. Charles.
The lights turned out great and I wanted to share my method for installing the LEDs. It's not rocket science, but you may find a tip or two here.
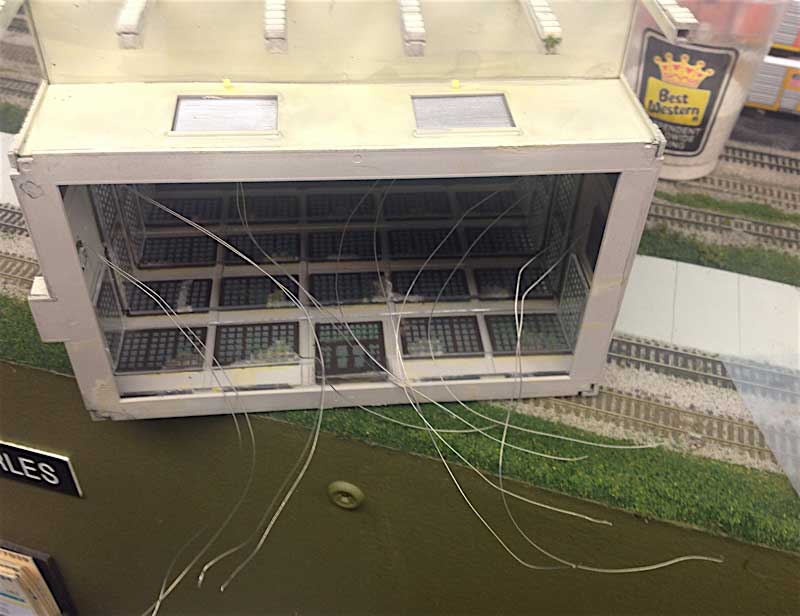
Step 1 - buy the pre-wired LEDs off eBay (free shipping from China!) and install in the buildings. I just drill a small hole at the location, thread the wires in and secure in place with a tiny dab of super glue. A quick shot of CA accelerator, and the LED is secure.
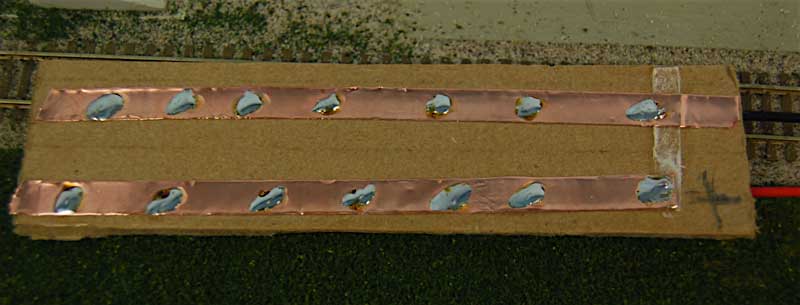
Step 2 - I make an electrical bus with copper strips that are used for stained glass windows. It has an adhesive backing and takes solder REALLY well. I also use wiring connector plugs (from eBay) that allow me to building these things at the work bench, then plug them into a 12 volt supply from under the layout. Both the positive bus and the ground bus are tinned where I will land the resistors and the wires.
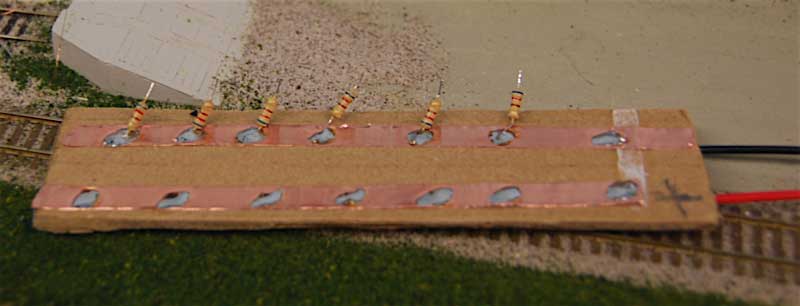
Step 3 - I trim the leads from the resistors and solder into place. The resistor leads going to the bus don't need to be tinned, but I tin the free ends, because it makes the next step a LOT easier. The resistors values have been selected to provide good intensity with a 12 volt supply.

Step 4 - I then tin the wires from the LEDs, being mindful of which wire is the positive (these are light emitting diodes, right, so polarity is important). I land the wires. At the positive bus, the wires attach very easily and quickly. For the resistor side, I use the "Kasper paralllel soldering method", where the two wires are tinned, held parallel, heated simultaneously, then held precisely in place while the solder cools. This technique requires a steady hand, and tinning the wires beforehand is crucial. I'm getting better at it.
Elite Operator™ tip! It doesn't matter if the resistors go before the LEDs or after the LEDs in the circuit. Just sayin'.
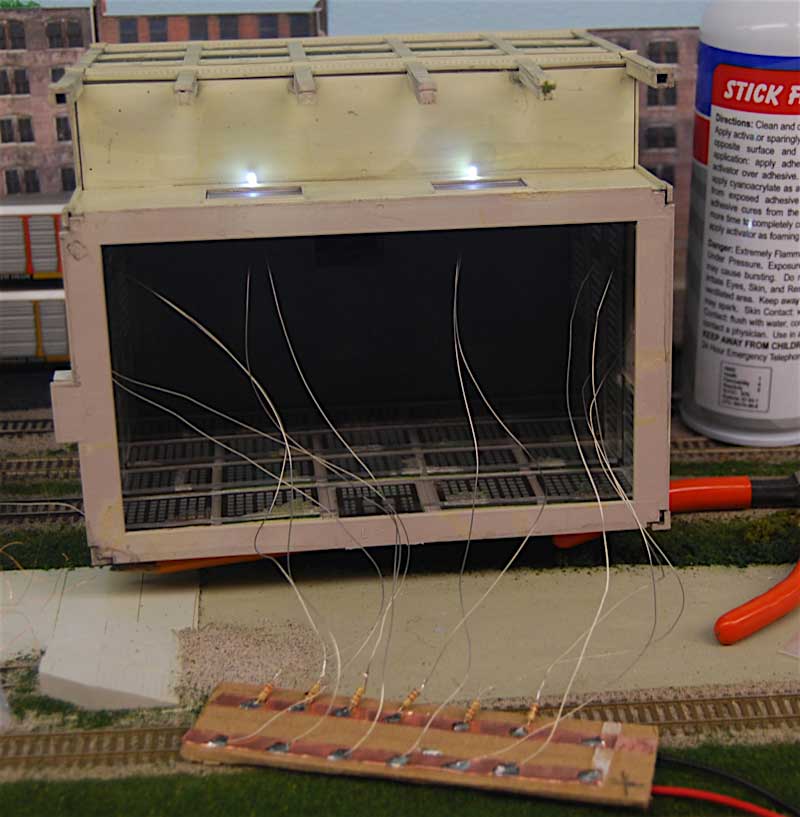
Step 5 - Test the wiring (I have a battery pack with a connecting plug to help with this step.
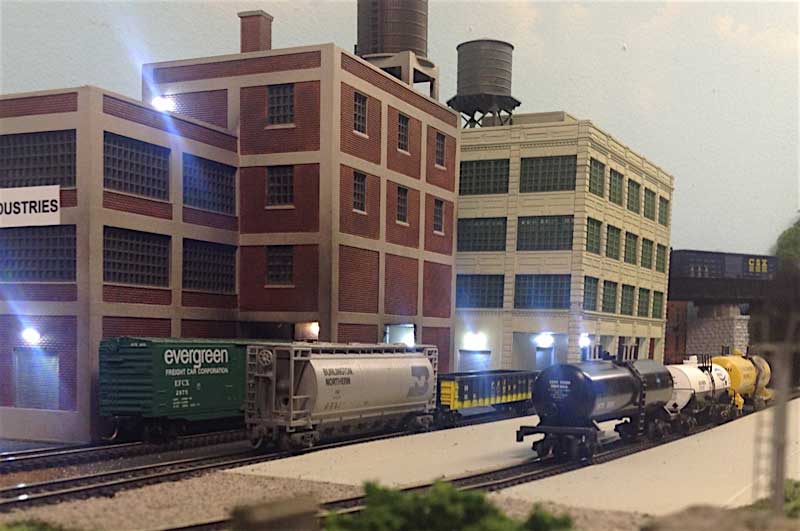
VOILA! Yummy lighting goodness! I think lighting really adds to the scene. These LEDs are cool white - they also sell a "warm white" version that I like a bit better. I may warm these LEDs up a bit with a dab of Tamiya clear tinted paint.
I wanted to add some lighting the ACF Car Repair buildings at East St. Charles.
The lights turned out great and I wanted to share my method for installing the LEDs. It's not rocket science, but you may find a tip or two here.
Step 1 - buy the pre-wired LEDs off eBay (free shipping from China!) and install in the buildings. I just drill a small hole at the location, thread the wires in and secure in place with a tiny dab of super glue. A quick shot of CA accelerator, and the LED is secure.
Step 2 - I make an electrical bus with copper strips that are used for stained glass windows. It has an adhesive backing and takes solder REALLY well. I also use wiring connector plugs (from eBay) that allow me to building these things at the work bench, then plug them into a 12 volt supply from under the layout. Both the positive bus and the ground bus are tinned where I will land the resistors and the wires.
Step 3 - I trim the leads from the resistors and solder into place. The resistor leads going to the bus don't need to be tinned, but I tin the free ends, because it makes the next step a LOT easier. The resistors values have been selected to provide good intensity with a 12 volt supply.
Step 4 - I then tin the wires from the LEDs, being mindful of which wire is the positive (these are light emitting diodes, right, so polarity is important). I land the wires. At the positive bus, the wires attach very easily and quickly. For the resistor side, I use the "Kasper paralllel soldering method", where the two wires are tinned, held parallel, heated simultaneously, then held precisely in place while the solder cools. This technique requires a steady hand, and tinning the wires beforehand is crucial. I'm getting better at it.
Elite Operator™ tip! It doesn't matter if the resistors go before the LEDs or after the LEDs in the circuit. Just sayin'.
Step 5 - Test the wiring (I have a battery pack with a connecting plug to help with this step.
VOILA! Yummy lighting goodness! I think lighting really adds to the scene. These LEDs are cool white - they also sell a "warm white" version that I like a bit better. I may warm these LEDs up a bit with a dab of Tamiya clear tinted paint.